Findings Overview
The Findings page provides an aggregated view of all Common Vulnerabilities and Exposures (CVEs) detected across your Development (DEV), Staging (STG), and Production (PRD) environments. Use it to view, resolve, or justify CVEs, address compliance results, and review security team responses to your proposed resolutions.
The sections below guide you through accessing findings in each environment.
Review findings in DEV environment
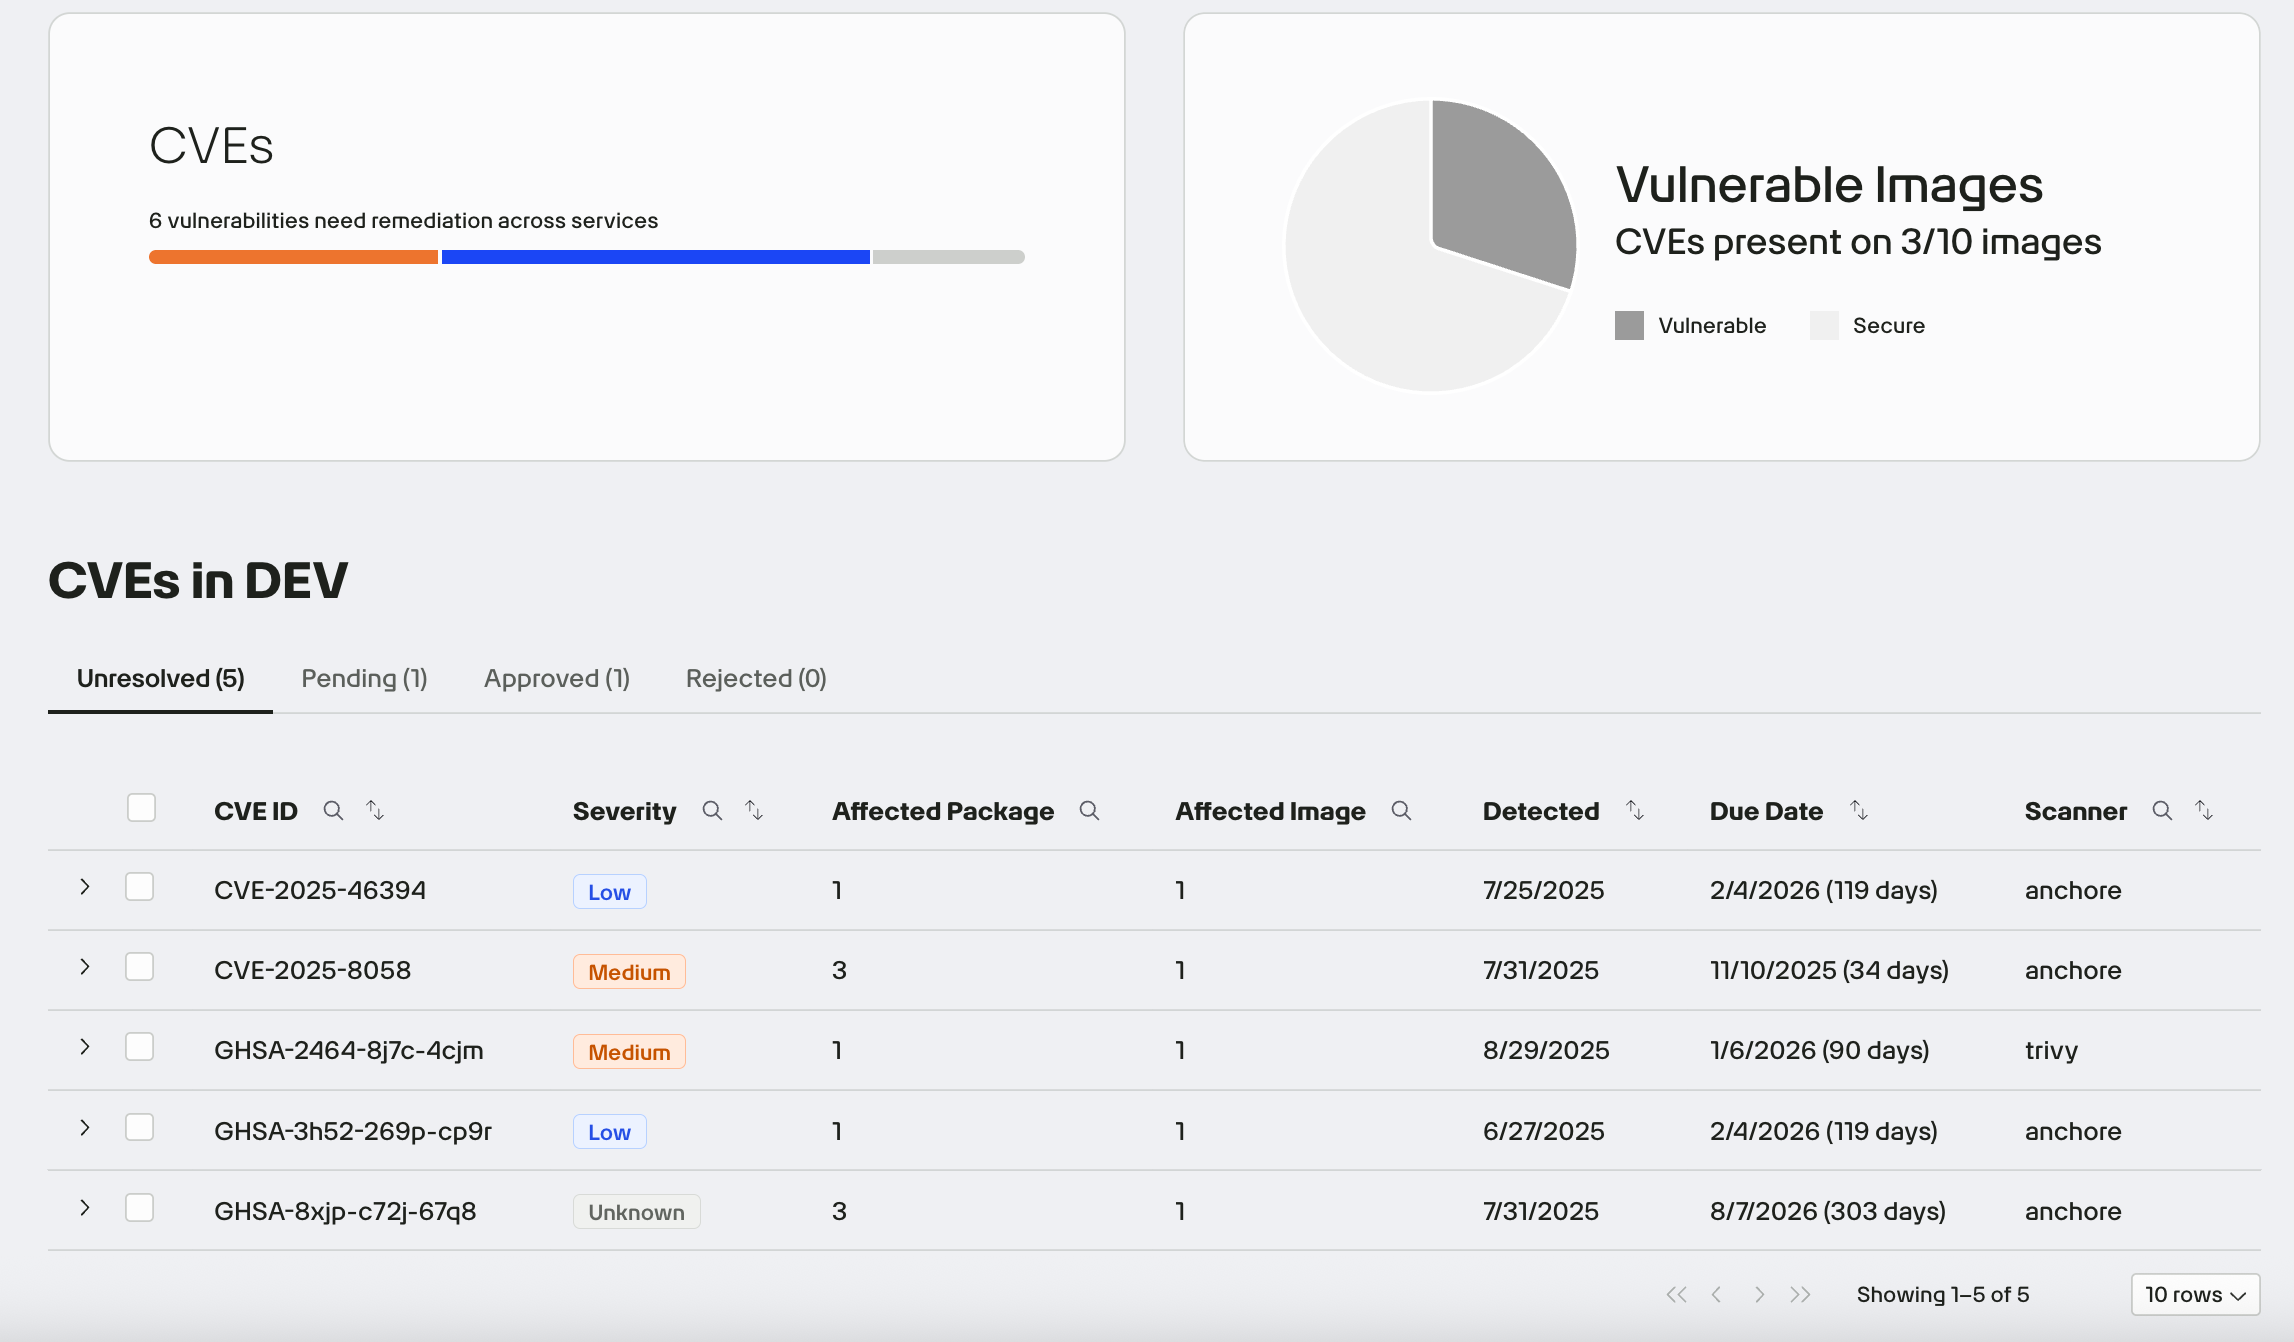
In the left navigation, click Findings, then select the CVEs tab to view all CVEs detected in your DEV environment. From this page, you can:
- View discovered CVEs with affected package and image counts
- Submit justifications (risk acceptance, compensating controls, false positives)
- Review and remediate security policy and compliance findings
- Track responses and dispositions from Second Front
Once you are granted access to your Harbor repository, you can begin pushing your containerized images. Our pipelines will automatically scan these images using integrated security tools and populate the Findings page with the results.
Scan time varies depending on the size and complexity of the image. If results do not appear in the Findings page after pushing your image, please notify our team by submitting a support ticket.
Review scan results
On the Findings page, information is organized to help you focus on CVEs and identify the top vulnerability priorities for your application. Each application package has its own Findings view with corresponding scan results.
The numbers display in the Affected Package and Affected Image show you how broadly a CVE is present in your application. Expand each row to view the exact affected packages and images.
Expand a row to see its affected packages and images. Click any affected image to view findings and download the raw scan data and Software Bill of Materials (SBOM).
Severity status hierarchy
Vulnerabilities are categorized by severity using industry-standard scoring:
| Severity | Description |
|---|---|
| Critical | Immediate remediation required. These could be exploitable remotely and have high impact. |
| High | Should be addressed quickly but may not pose as severe a risk as Critical. |
| Medium | Important to fix, but not an urgent blocker. |
| Low | Minor issues or informational findings. |
| Policy | Issues that violate platform-defined compliance policies. |
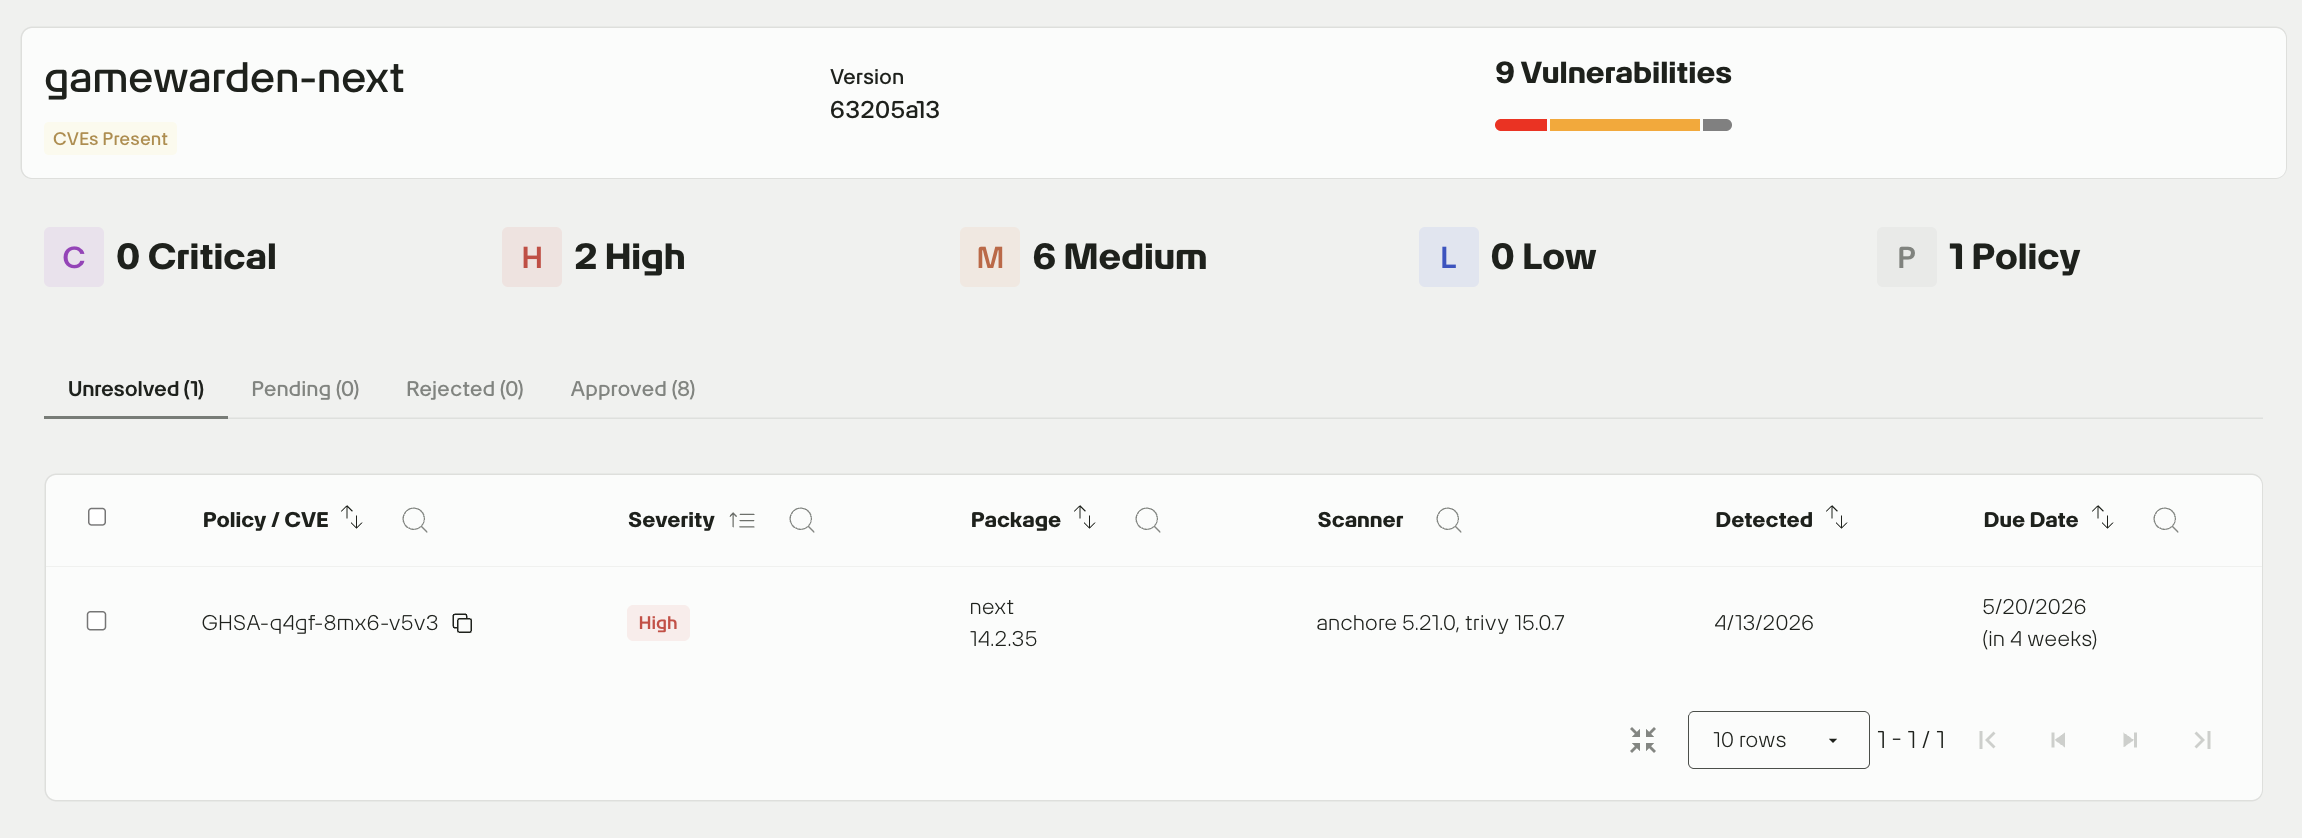
Resolution tracking
Each vulnerability is assigned one of the following statuses. Use the tabs to filter by status and track progress and decisions.
| Status | Description |
|---|---|
| Unresolved | No action taken yet. |
| Pending | Justification submitted, awaiting review from Security. |
| Rejected | Justification denied; remediation is required. |
| Approved | Justification accepted; no further action needed. |
Bulk actions for justifications
You can select multiple packages at once and apply a single justification to address the same vulnerability across all selected packages. This streamlines the process when multiple components share a common issue and resolution rationale.
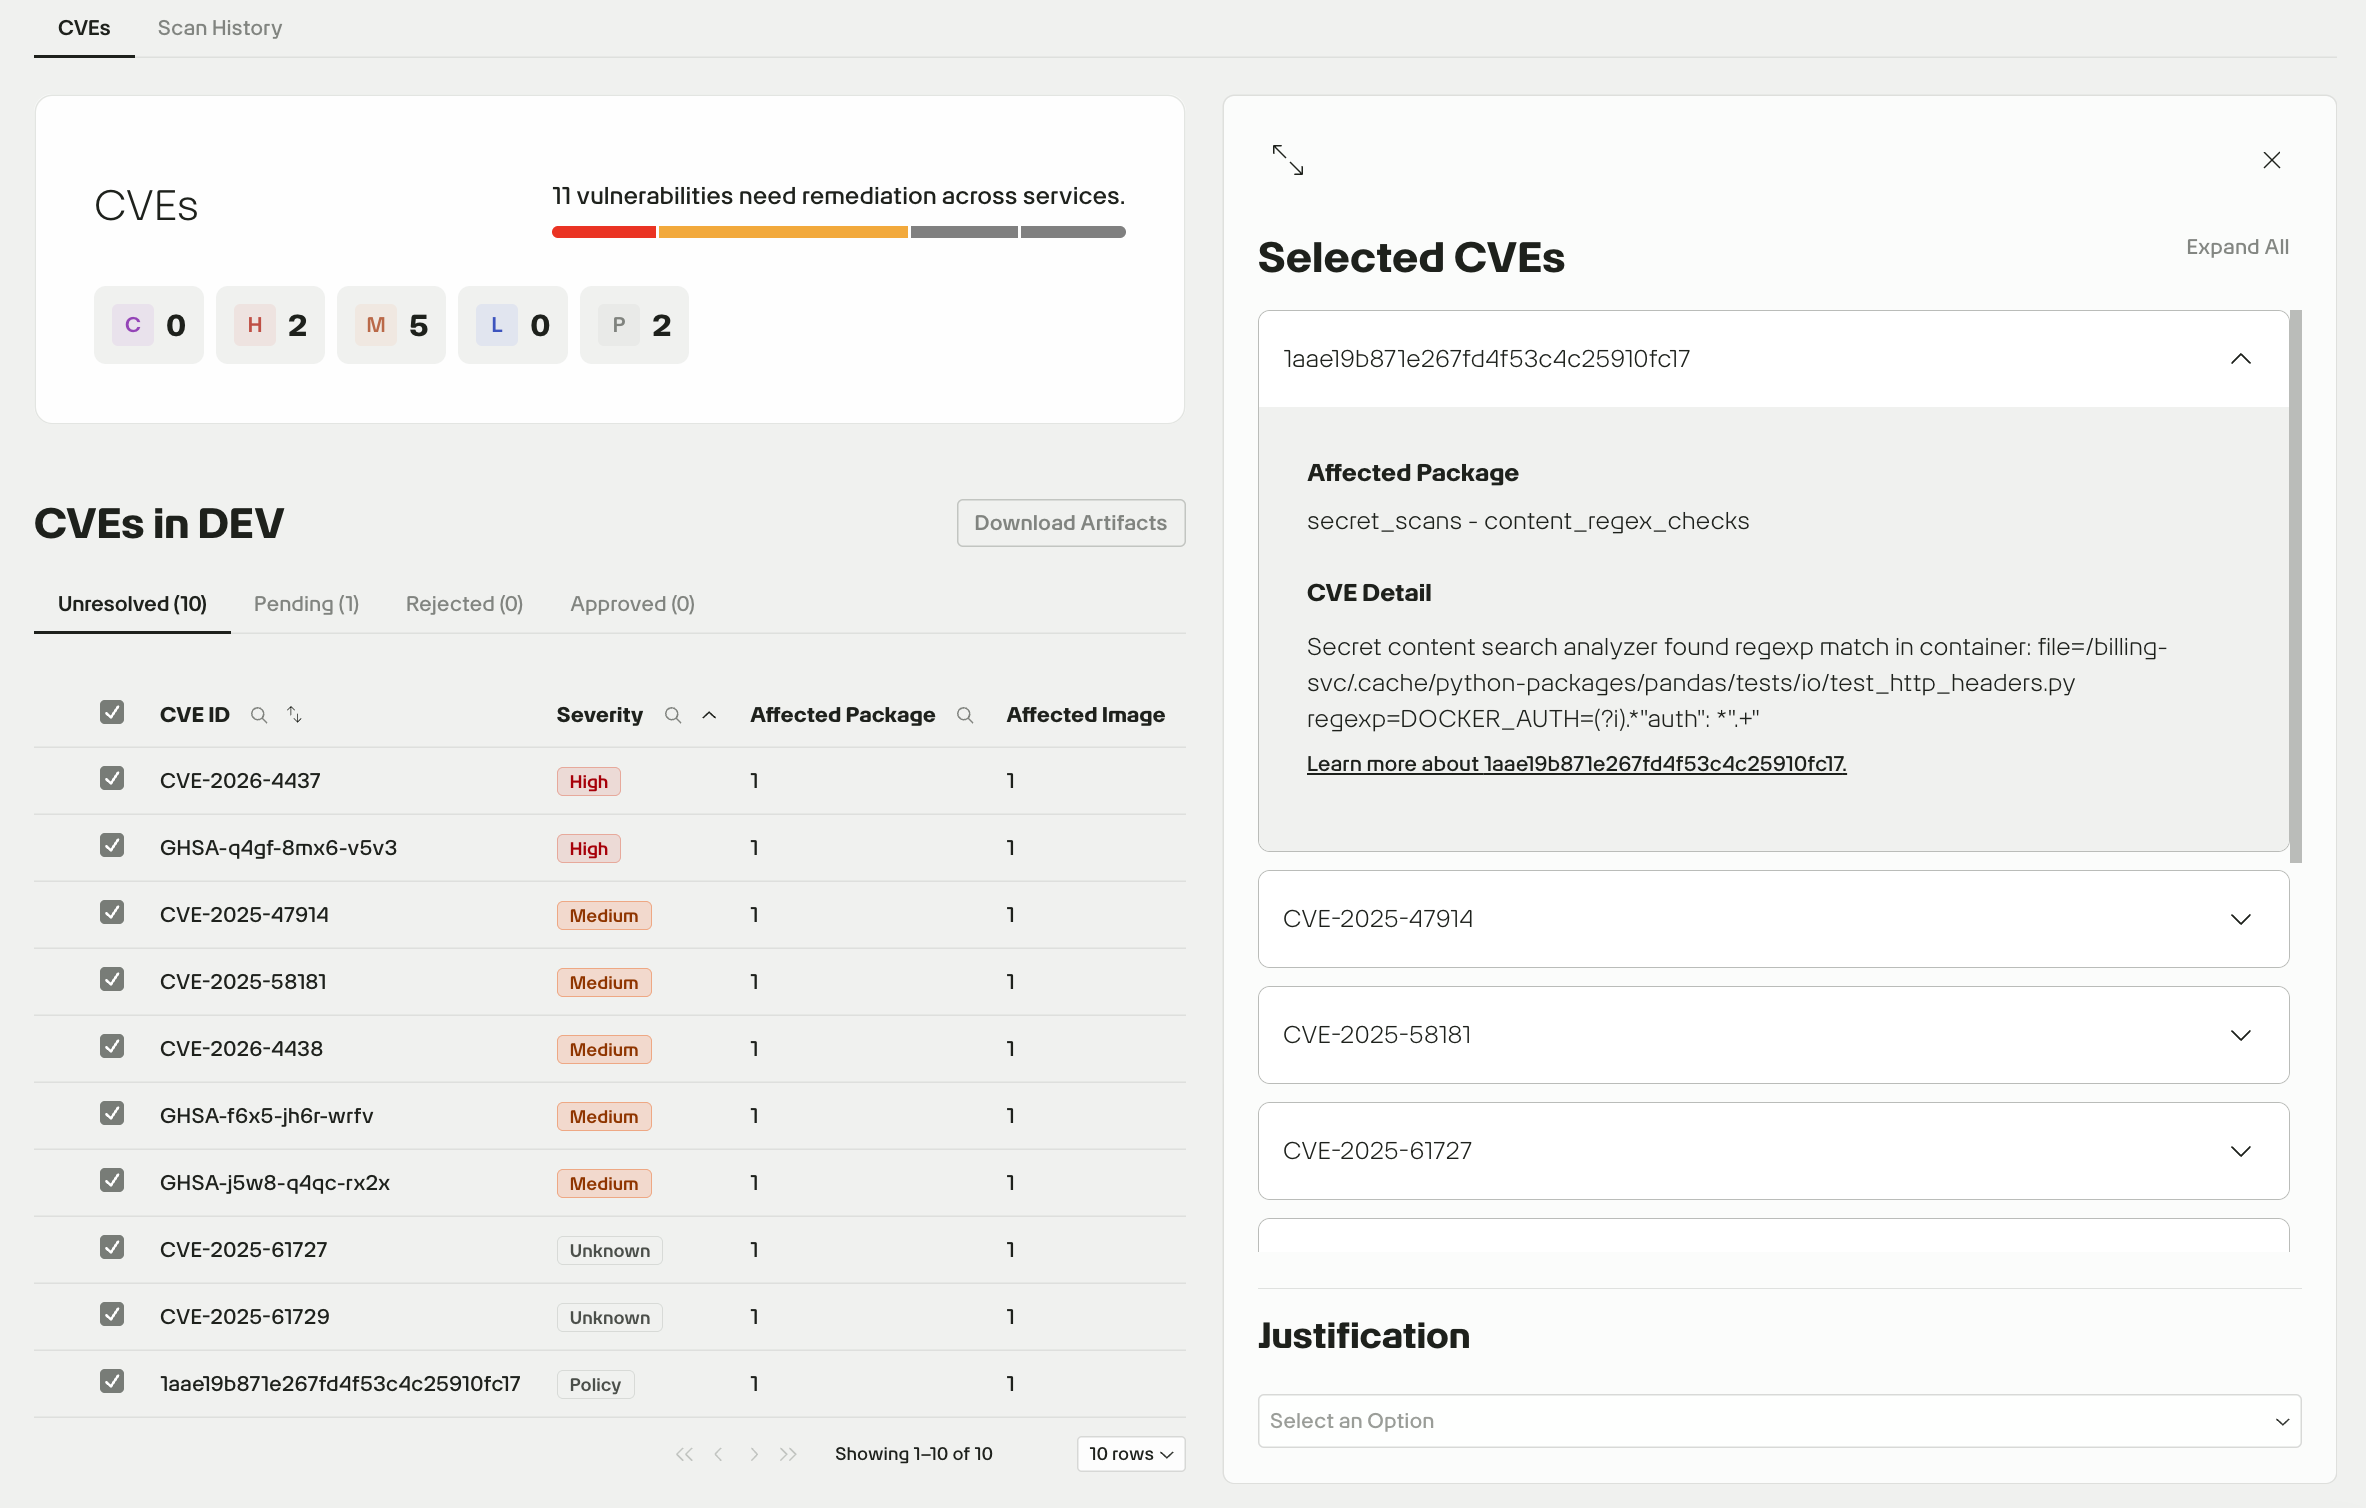
After you submit a justification, it moves to the Pending tab for review by the 2F Security team. If needed, you can edit the justification from this tab.
Download all DEV artifacts
To download artifacts for all images deployed to your DEV environment, click the Download Artifact button in the top right of the Findings dashboard.
Scan history
To access scan results for older versions of images, click the Scan History tab.
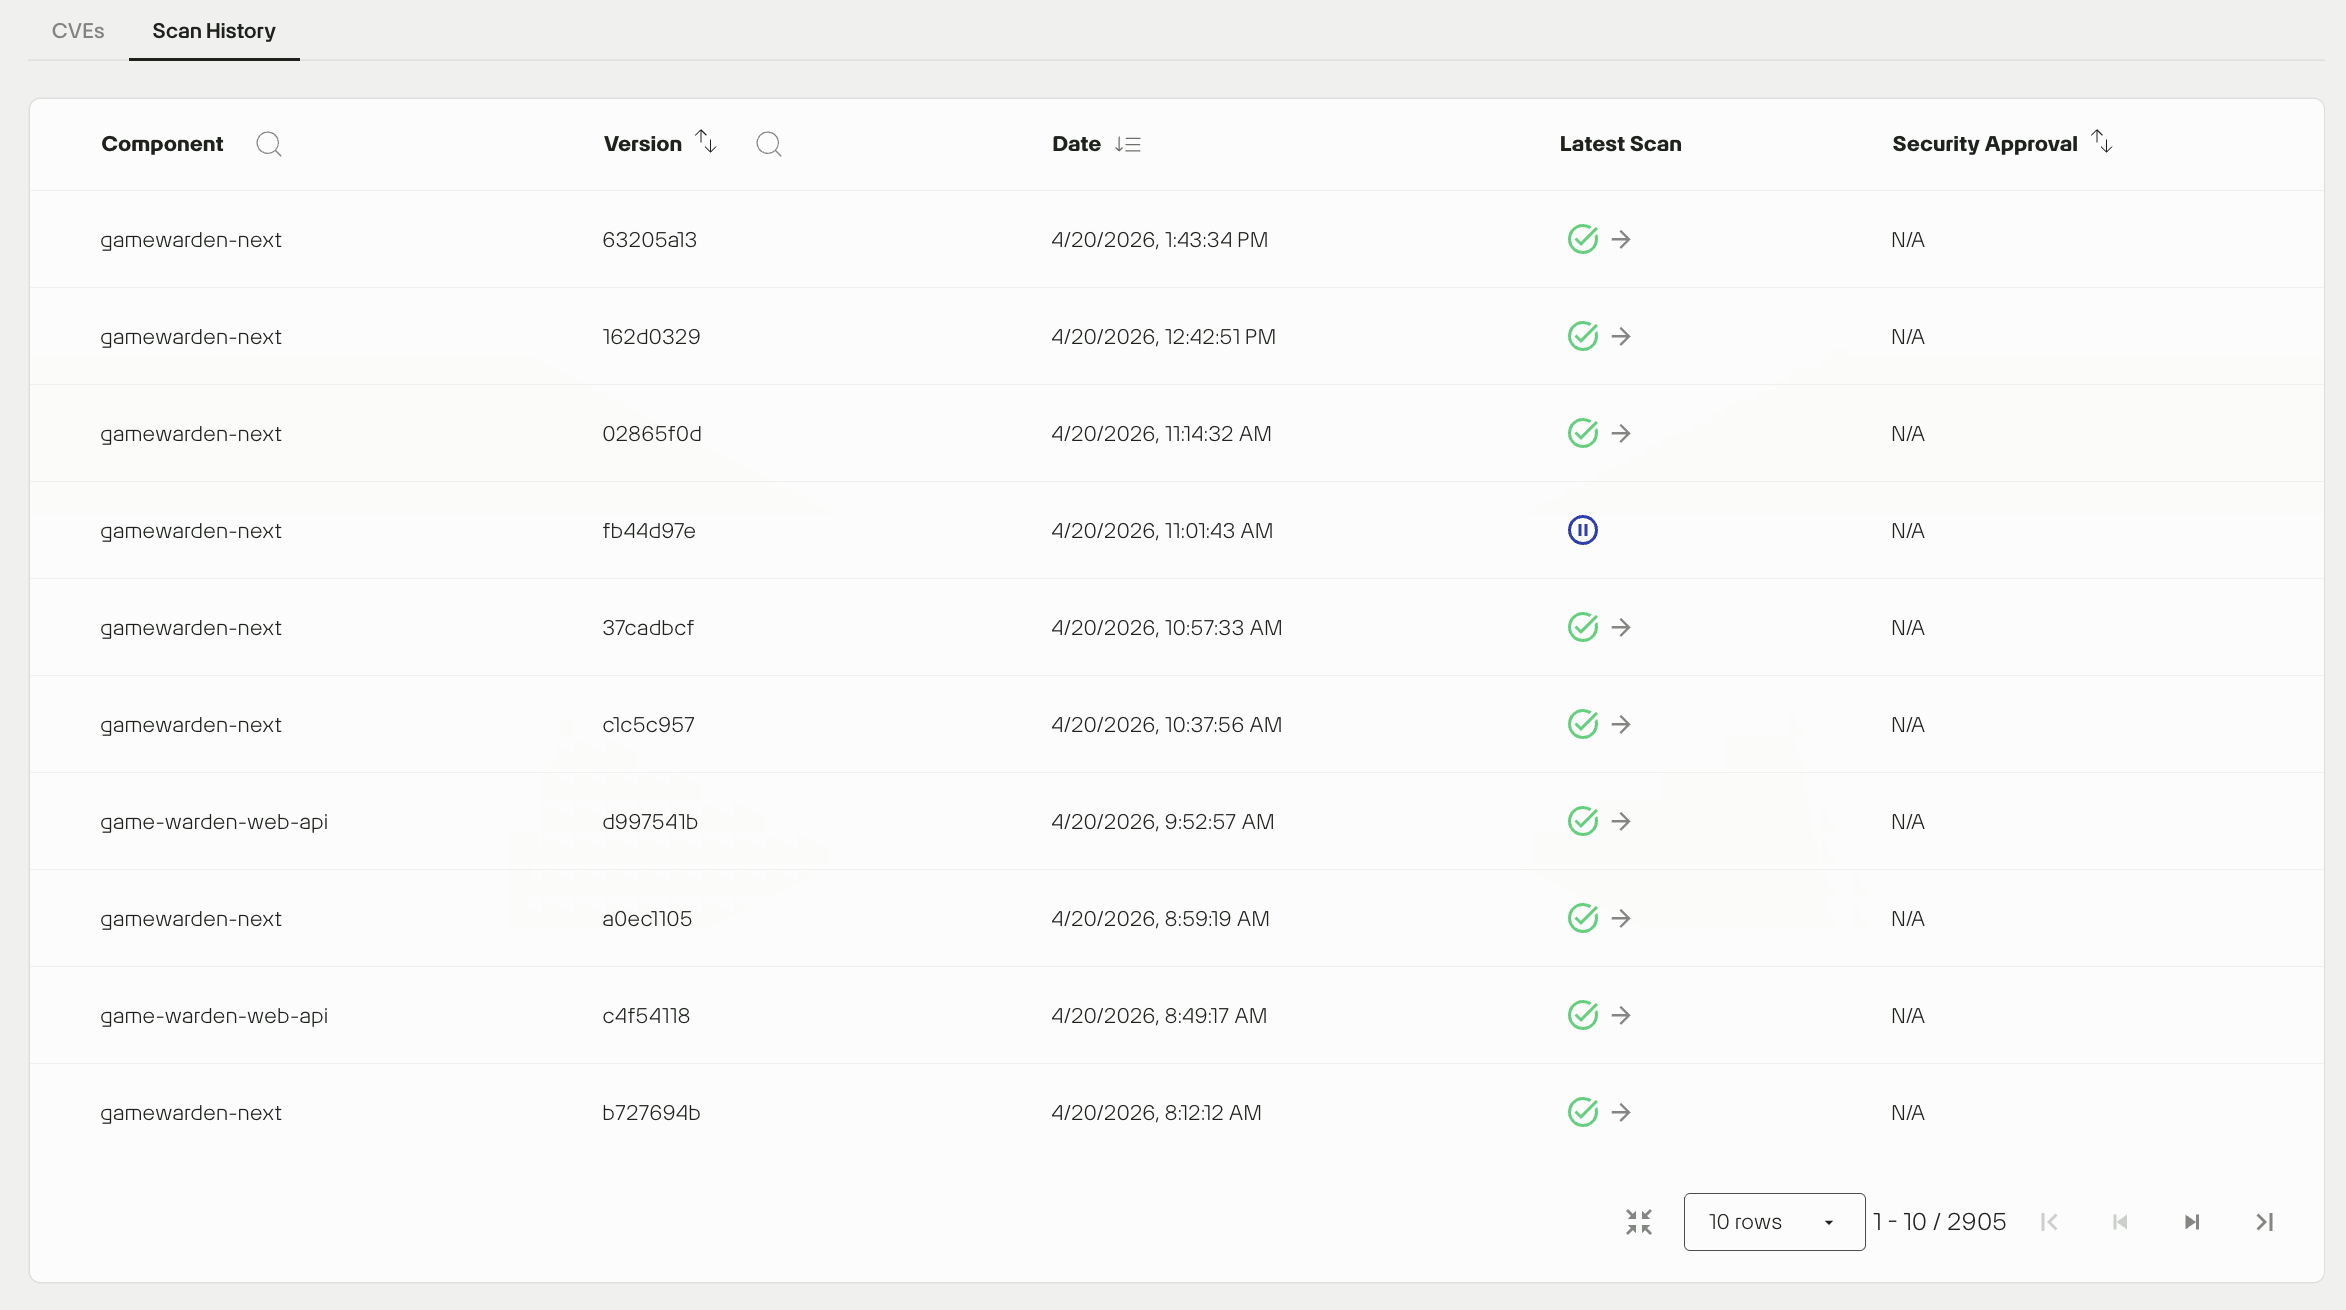
To access scan results for a specific version, click the link in the Latest Scan column.
How to leverage this scan history
- Version comparison: If a CVE appears in your current build, check older versions to pinpoint when the vulnerability was introduced.
- Approval tracking: Verify the Security Approval status of a legacy version to confirm it was officially cleared before deployment.
Review findings in STG and PRD environments
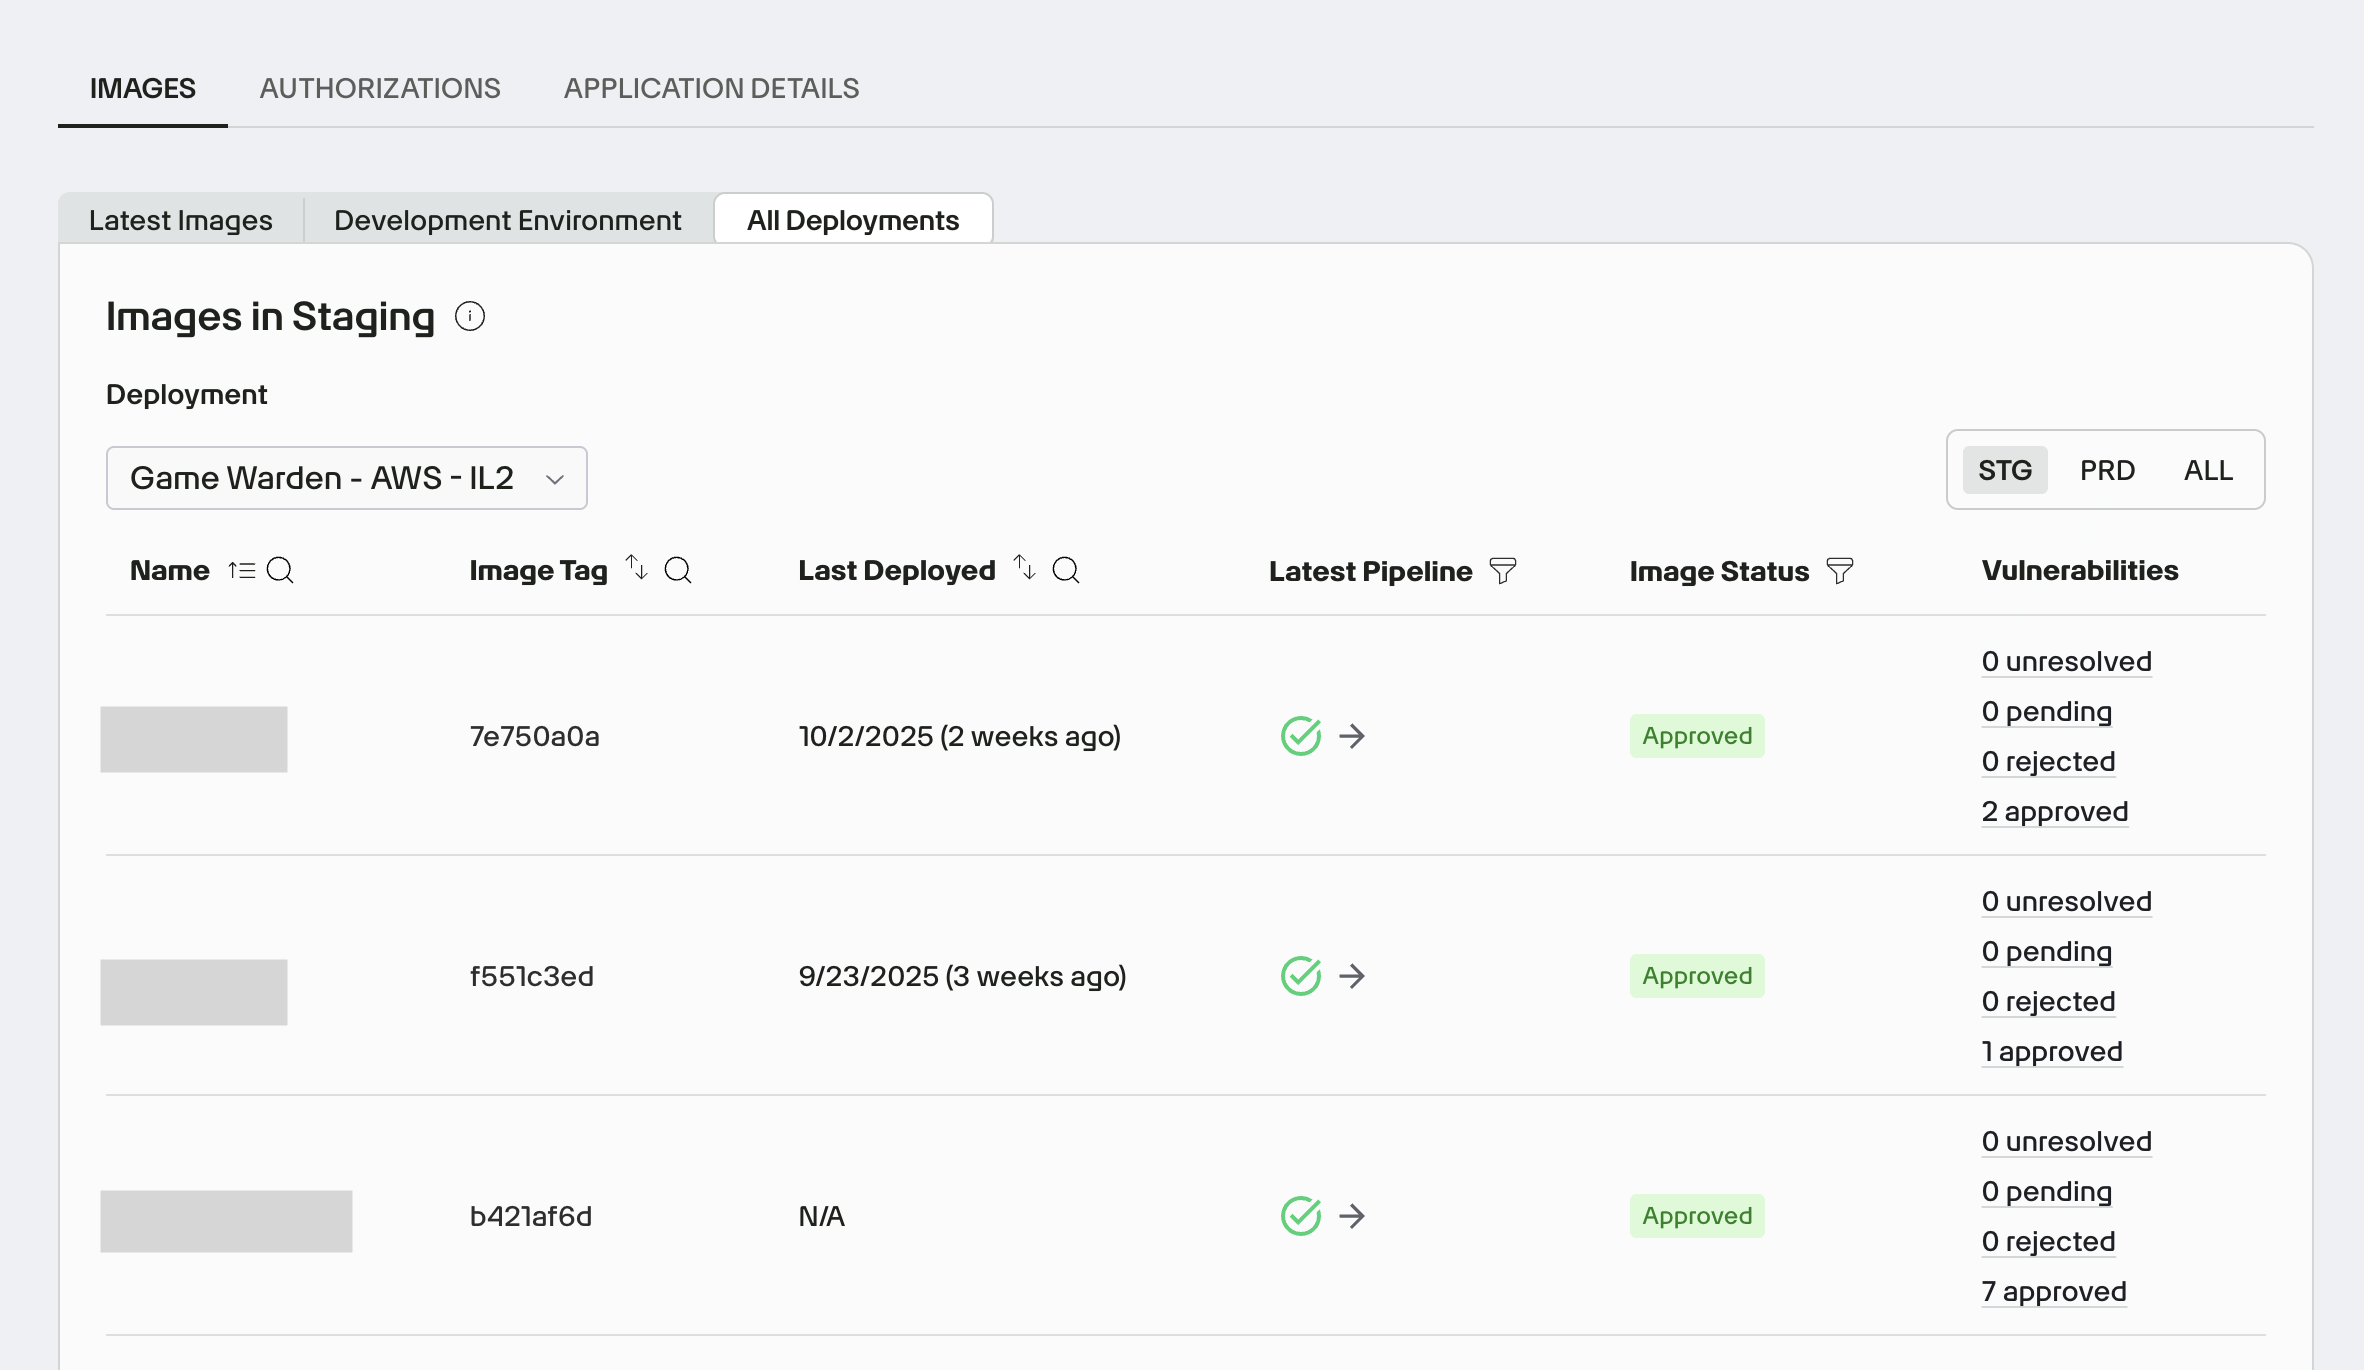
To view image findings for your app in STG and PRD:
- In App Central, open the Images tab and click All Deployments.
- Use the Deployment dropdown to select the deployment you want to review. Apps can have multiple deployments across impact levels and may be deployed to STG and/or PRD within the same impact level.
- Use the Environment toggle (top right) to filter findings by STG, PRD, or All.
- For each image, click the links in the Vulnerabilities column to jump to its CVE status view, with counts by justification status (Unresolved, Pending, Rejected, and Approved).
Warning
- If a CVE is detected in an image currently deployed to the PRD environment, you must upload a new image with the vulnerability remediated. Justifications for unresolved CVEs are only accepted for images in the DEV or STG environments.
- To submit your resolutions to the Game Warden team, you must address all security findings for your image.
Request security review
For DoW, FedRAMP and Commercial deployments, once all findings have been resolved or properly justified, click the Ask for security review button to send a review request. The Game Warden security team will review your submissions and either approve or deny your proposed resolutions.
If a new pipeline is run against the image under security review, the status will change to customer review and the Ask for security review button will need to be selected again to send a review request for the newly run pipeline push.
Tip
To help ensure your review is completed within a timely manner, focus on the quality of your submission:
-
Detailed Justifications: For any accepted risk or exception, provide clear, specific, and well-supported justification and mitigation strategies before submission in Scan Lab.xw
-
Clear Documentation: Ensure your documentation is well-structured and complete at the time of submission to reduce the need for back-and-forth clarification within Findings.
Download FedRAMP ConMon artifacts
After successfully resolving or properly justifying every vulnerability within Findings, the documentation must be submitted for official resolution and approval, involving the customer, their agency, and the 3PAO.
Follow these steps:
- Go to App Central in Game Warden.
- Open your application, click Authorizations and go to the Document Repository under the specific Deployments.
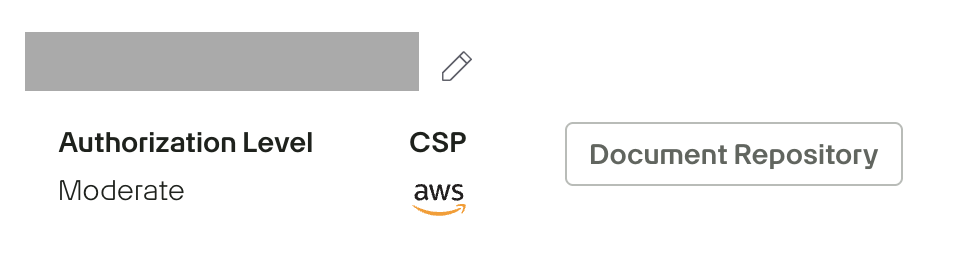
- Select Images, then click the ✏️ (pencil) icon.
- From the dropdown, choose the relevant image version.
- Click the Export Vulnerabilities JSON button.
- Provide the generated machine-readable JSON file to the Security Advisory Services and Agency for review and approval.
Download artifacts within Findings
When viewing detailed findings of an image, click the Download Artifacts button in the upper-right corner to download your raw scan data and SBOM. This makes it easier to share information or work offline.
Production image scanning
Game Warden performs automated vulnerability scans on all customer-deployed production container images on the first calendar day of each month. This recurring scan schedule ensures that newly disclosed vulnerabilities are detected and surfaced in a timely manner.
When vulnerabilities are identified, your team will receive notifications through both Slack and the Game Warden app. These alerts enable prompt triage and resolution of security findings.
CVE due dates
- CVE remediation deadlines are enforced only after your application has been deployed to the PRD environment. Each CVE includes a due date for remediation or justification. This date aligns with the Remediation/Justification timeline specified in Table A of the Game Warden Acceptance Baseline Criteria.
- Your team is responsible for either resolving the CVE or submitting an acceptable justification by the stated deadline.
FAQs
Why did my justifications disappear after a new image push?
When you push a new image, the system re-evaluates all CVEs against the updated components. If a package version has changed, even as part of a routine library update, the system treats that CVE as a new finding and your previous justification does not carry over.
Your justifications will carry over automatically if all three of the following remain the same after a push:
- CVE ID
- Package/Dependency (including the version number)
- Customer Image (excluding the image version)
If you updated a library and your previous justifications did not carry over, that is expected behavior. Review the CVEs against the new version and resubmit any that still apply.