App Central (Beta)
App Central is the central hub for managing your applications and deployments on the Game Warden platform. From here, you can:
- Add new applications
- View and complete the Body of Evidence (BoE) for associated deployments
- Monitor service pipeline statuses and security findings in Findings
- Deploy images to both Staging (STG) and Production (PRD) environments
App Central Legacy vs. New App Central Redesigned
We've redesigned App Central from the ground up to make your journey more intuitive and reduce friction at every step:
- Streamlined deployments: Multi-view Images table (Latest | Development Environment | All Deployments) with environment targeting eliminates guesswork and accelerates safe promotions.
- Security visibility: Instant CVE overview across environments plus clear image statuses (Approved, Pending, CVEs Present, Ready to Submit) so teams know exactly when to act.
- Compliance tracking: Authorization renewal deadlines and Body of Evidence (BoE) access are managed in one place, ensuring your compliance process moves smoothly.
- Better navigation: Per-app pages with organized tabs and application switcher dropdown for faster workflow.
App Central walkthrough
When in App Central, you can view and take action on all key aspects of your applications and deployments.
| Feature | Description |
|---|---|
| Images tab | Displays all images for the selected application, organized by environment (e.g., Development (DEV), STG, and PRD). Shows vulnerability findings and their statuses. From here, you can deploy qualified images to STG and PRD environments. |
| Authorizations tab | Lists all deployments created for the selected application, along with their associated Impact Levels (ILs). From this page, you can complete the BoE for each deployment. |
| Application Details tab | Displays the application’s basic and administrative details. You can update these details at any time. |
Add new applications
To get started with a new application:
- If this is your first application in Game Warden, click Add new application. Otherwise, click the dropdown list of all your applications and select Add new application.
- Enter a name for your application, then click Save to create the application.
- To provide application details, select the Application Details tab.
- Enter the following information:
- Basic information about the application (name, URL, description)
- Company contact information
- Details of your Government Sponsor
- Proof of Authorization, such as a Certificate to Field (CtF)/Software Approval or an Authorization to Operate Letter
- Click Save changes.
Now that your application has been created, the next step is to push its images to Harbor Registry. See Push Images to Harbor.
The images will then be built and hardened automatically. Once this process is complete, the images and their vulnerability findings will appear in the Images tab in App Central.
Complete the BoE
For each deployment, you are required to complete the BoE-a formal document that explains how your application meets Game Warden’s Authority to Operate (ATO) security requirements. It is a critical component in obtaining your CtF/Software Approval.
Follow the instructions in Create and Manage Body of Evidence and Complete Body of Evidence to create and complete the BoE.
Deploy images to STG and PRD environments
Customer Admin role required
Only users with the Customer Admin role can deploy images. To request a permission update, submit a Support Ticket through the Game Warden app.
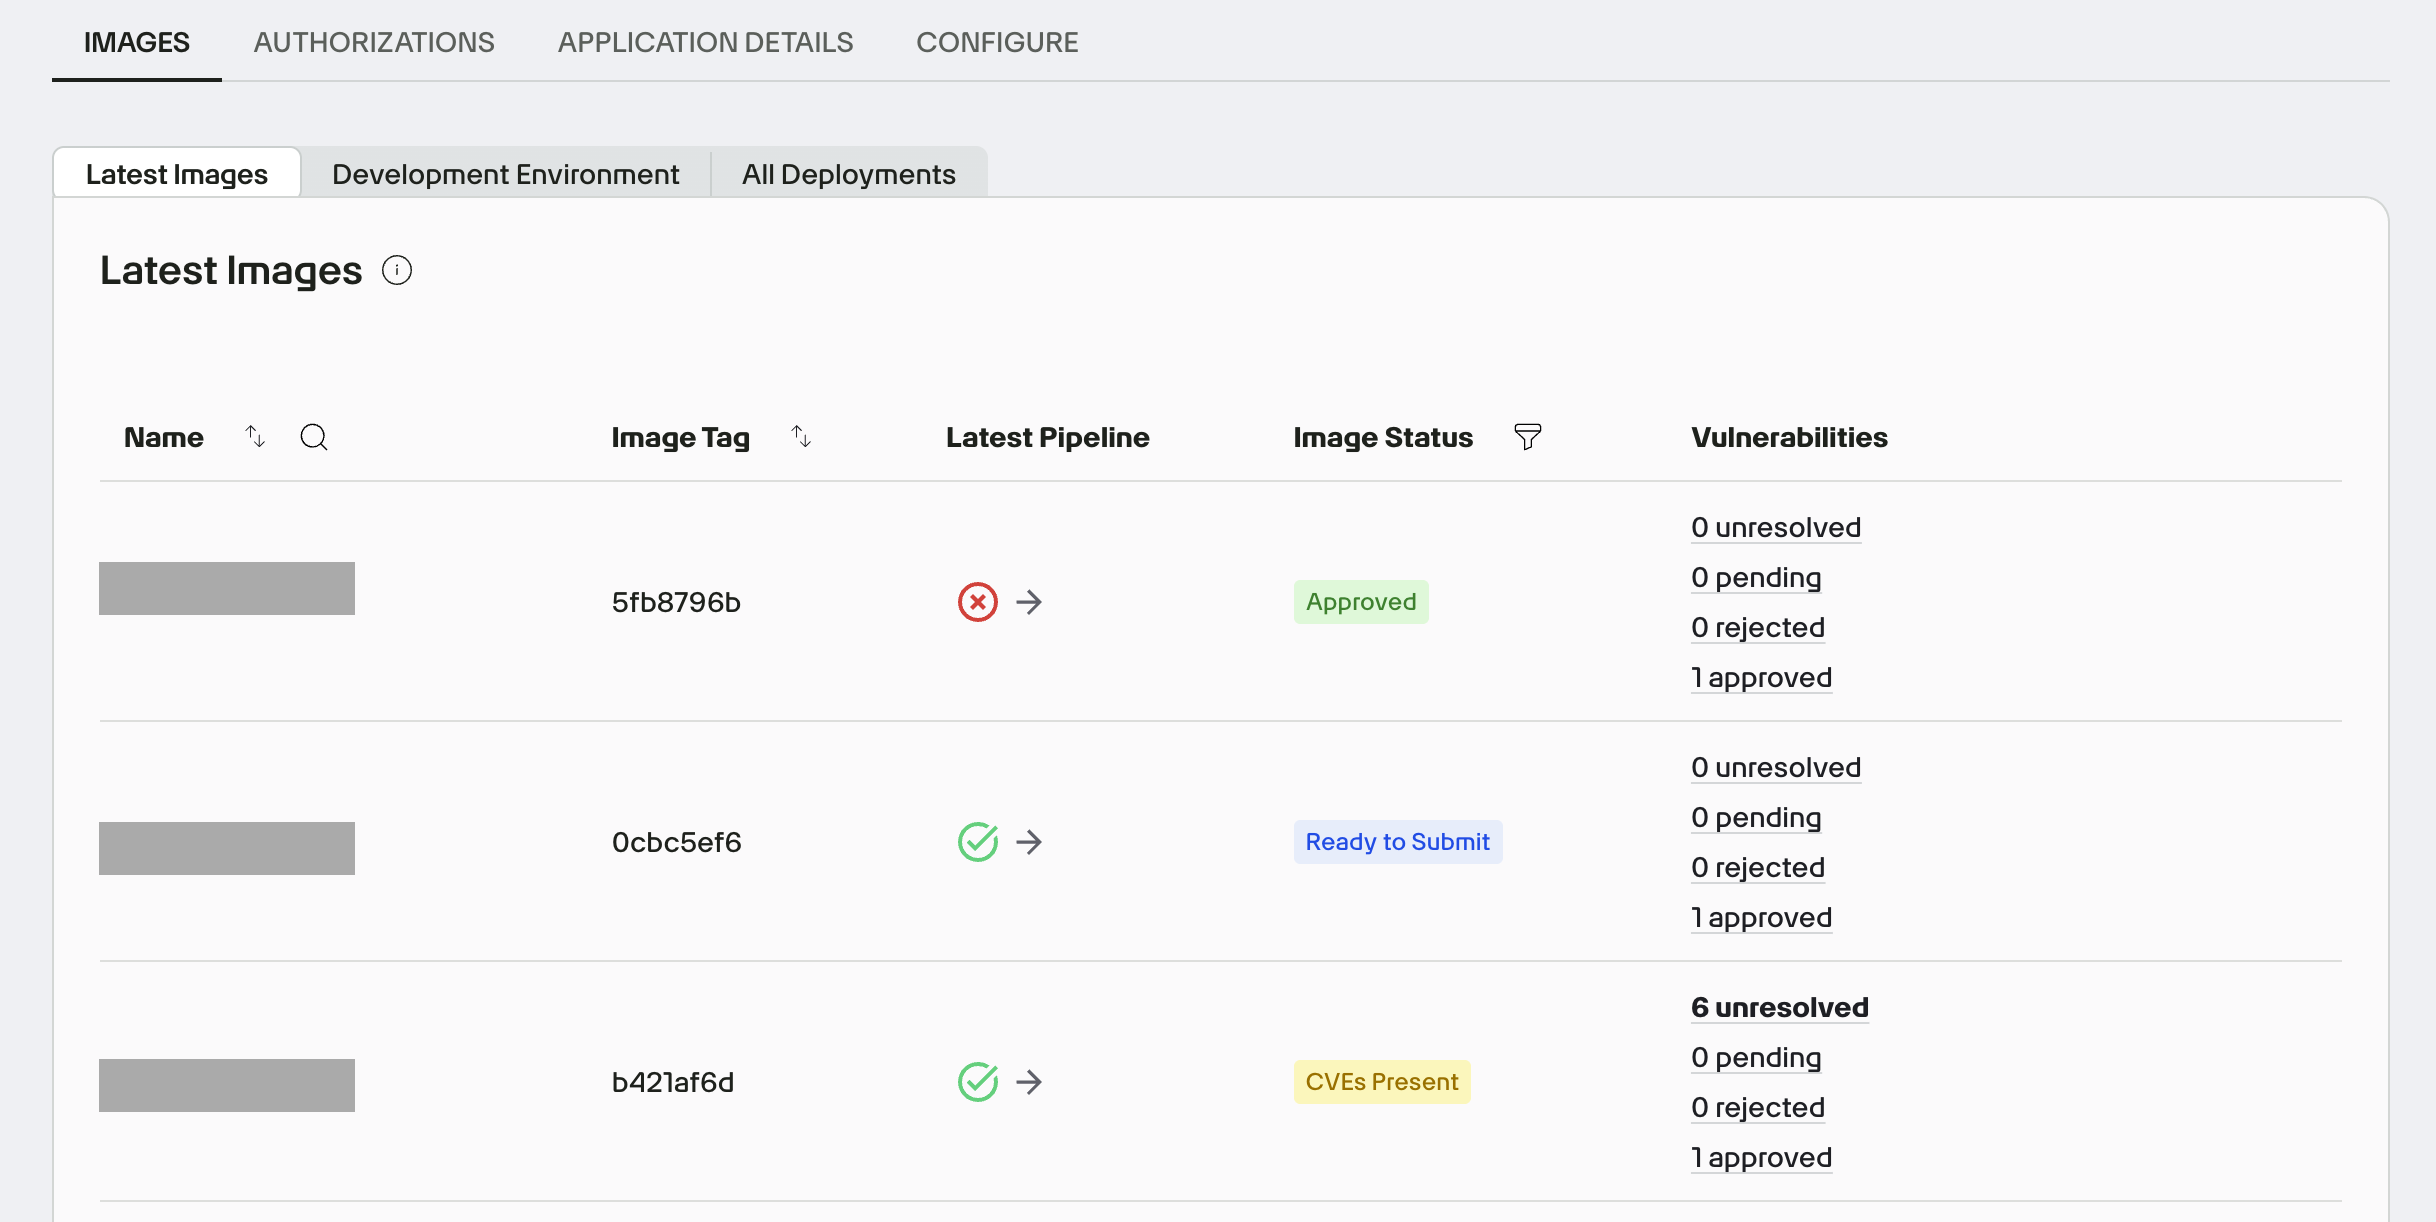
Within the Images tab, you can:
- View recently pushed images --> select Latest Images.
- View images in the DEV environment --> select Development Environment. To see all discovered CVEs in DEV, go to the Findings page.
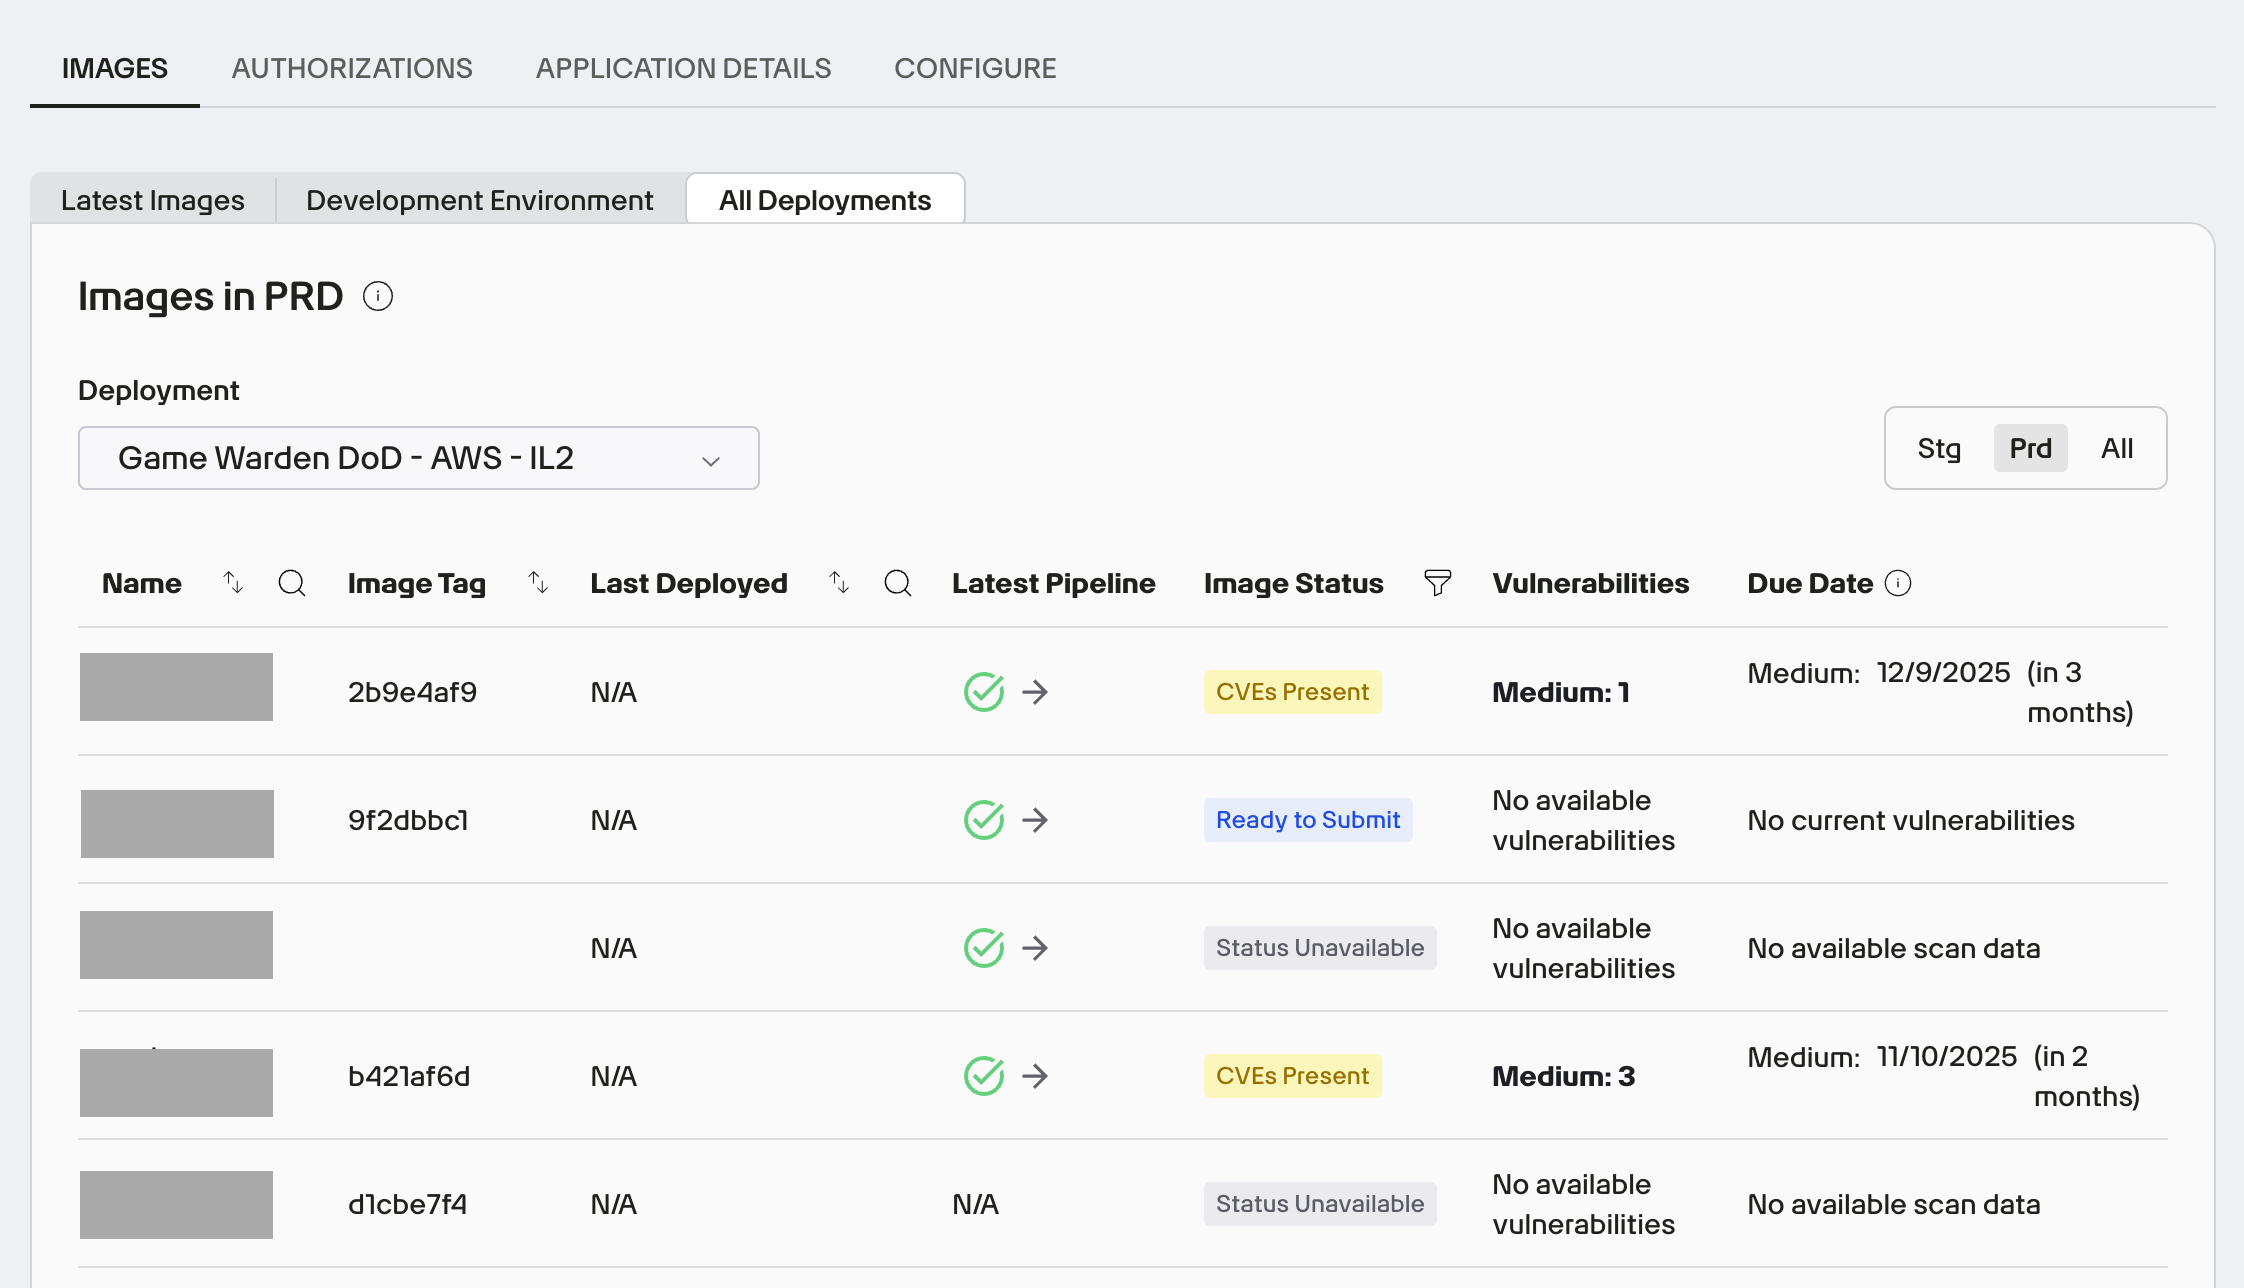
-
View images currently deployed across STG and PRD --> select All Deployments. To see which image version is currently used in DEV, STG, and PRD, set the view toggle on this tab to All.
-
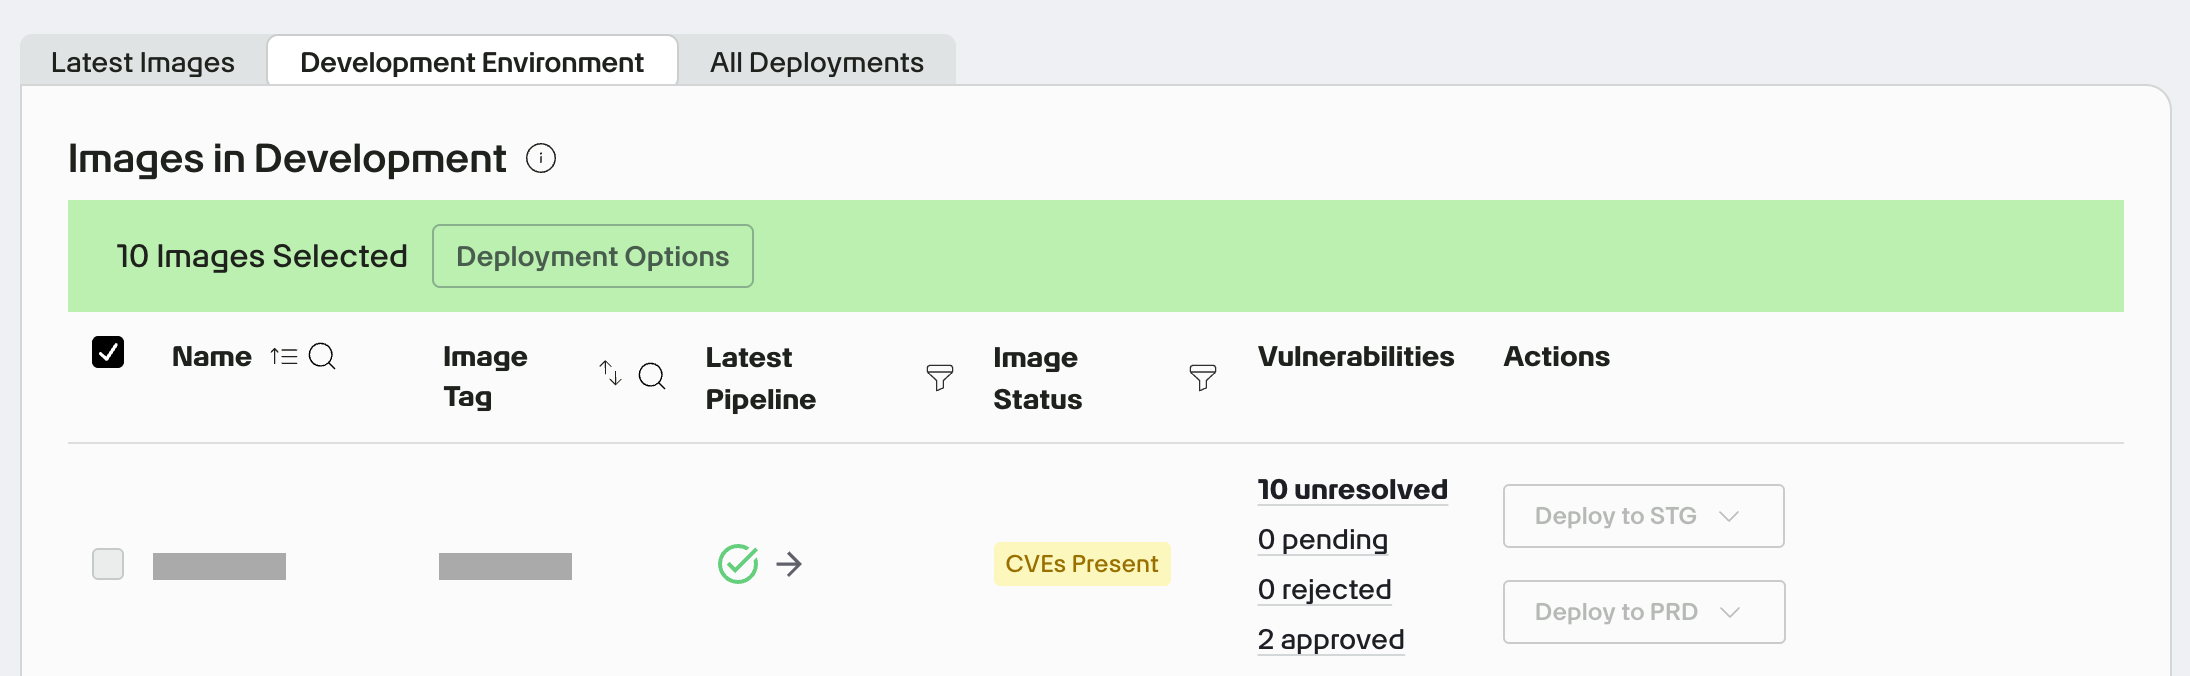
Deploy Approved images from DEV to STG and PRD. If an image is associated with multiple deployments, you can deploy to a specific deployment or to all applicable deployments using the bulk deployment feature.
Bulk deployments
Bulk deployments let you deploy images to different deployments, or across environments within the same deployment (e.g., DEV → STG → PRD).
Steps to bulk deploy images:
- Go to the Images tab and select Development Environment.
-
Select the images you want to deploy, then click Deployment Options.
-
In the Deployment Options panel, select the deployment and environment(s) to which you want to deploy the selected images.
If any selected images don’t meet the requirements for a given environment, they will be automatically excluded.
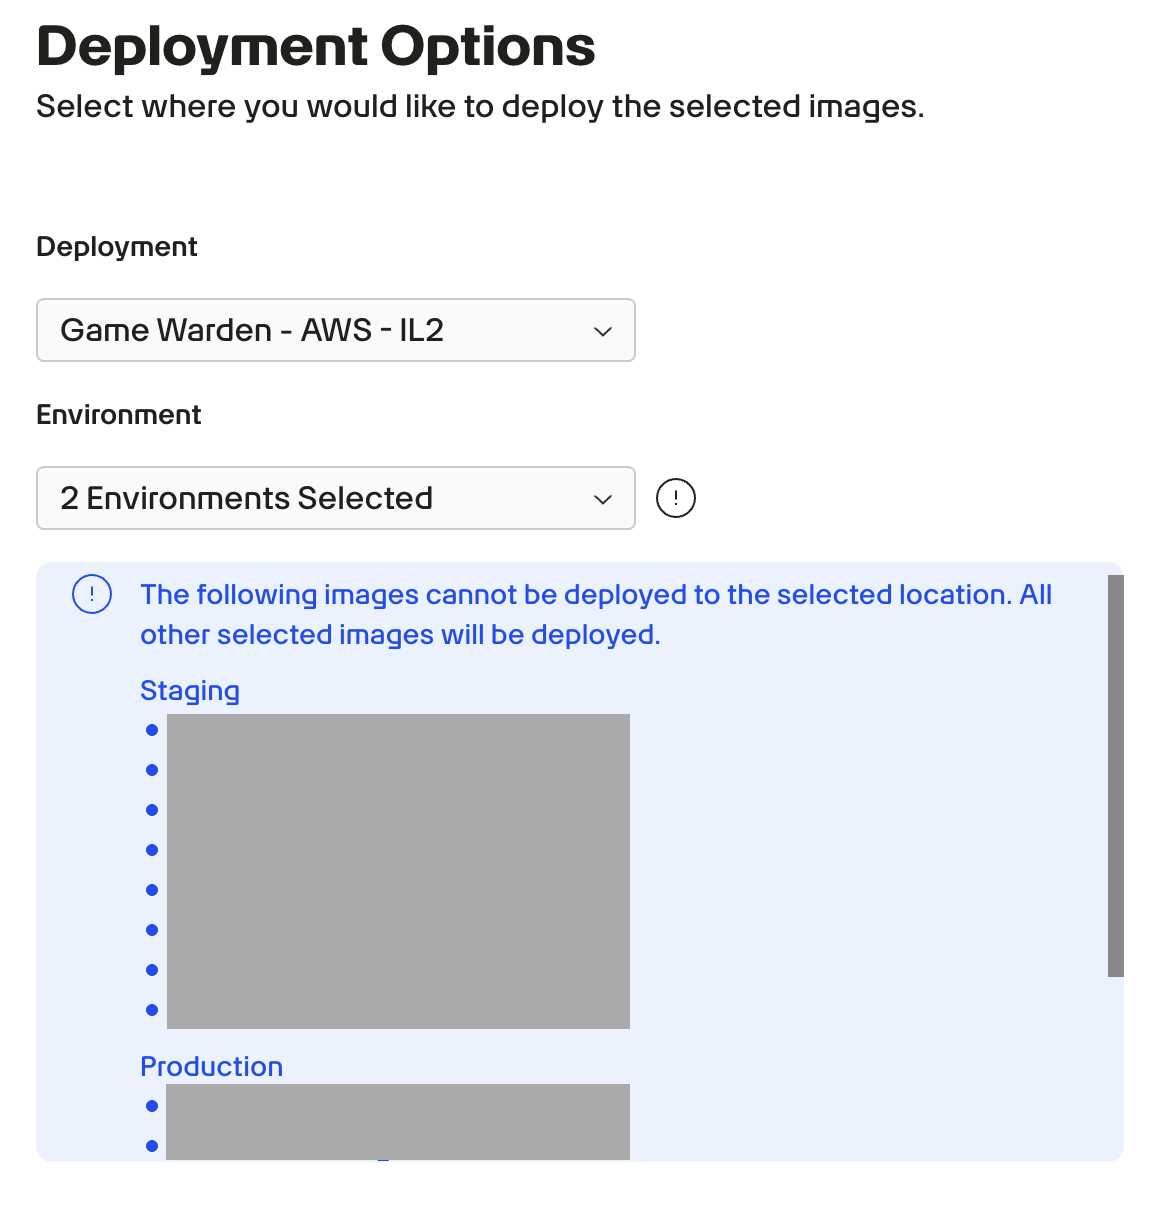
-
To perform multiple deployment actions in one workflow, click Add More Deployments.
- Click Confirm Selection to complete.