Harbor Overview
Game Warden uses Harbor as its secure container image registry. Harbor is an open-source, feature-rich solution that manages all images pushed into the platform. As part of the Game Warden CI/CD process, Harbor integrates with tools such as:
- Grype, Syft and Checkmarx supported Zed Attack Proxy for vulnerability scanning and compliance
- ClamAV for malware detection
As your images move through the scanning and hardening process, Harbor automatically appends status tags to the end of each image name.
This guide focuses on manually pushing images to Harbor via Docker commands in a terminal. If you're using automated pipelines, reach out to your Mission Success Manager (MSM) for robot credentials that prevent session expiration and streamline the process.
Note
If you're deploying unmodified Iron Bank images, the Game Warden team will pull them directly into the platform for you.
Prerequisites
- You have a Platform One (P1) Single Sign-On (SSO) account or a Game Warden account.
- You've been granted permission by Game Warden to push images on behalf of your company.
- Your company has submitted a list of authorized users (username + email) to Game Warden.
Warning
Do not create an account directly on Harbor Registry. Creating a standalone Harbor account will not grant access to your project and cannot be used to push images. Instead, create a Game Warden account first, then use those credentials to log in to Harbor via the login flow described below.
Access Harbor
- Go to Harbor Registry.
- Select Login with Game Warden SSO and enter your P1 SSO or Game Warden credentials.
- Once logged in, you will be directed to the Projects page.

- Locate and select your assigned project to display all associated artifacts.
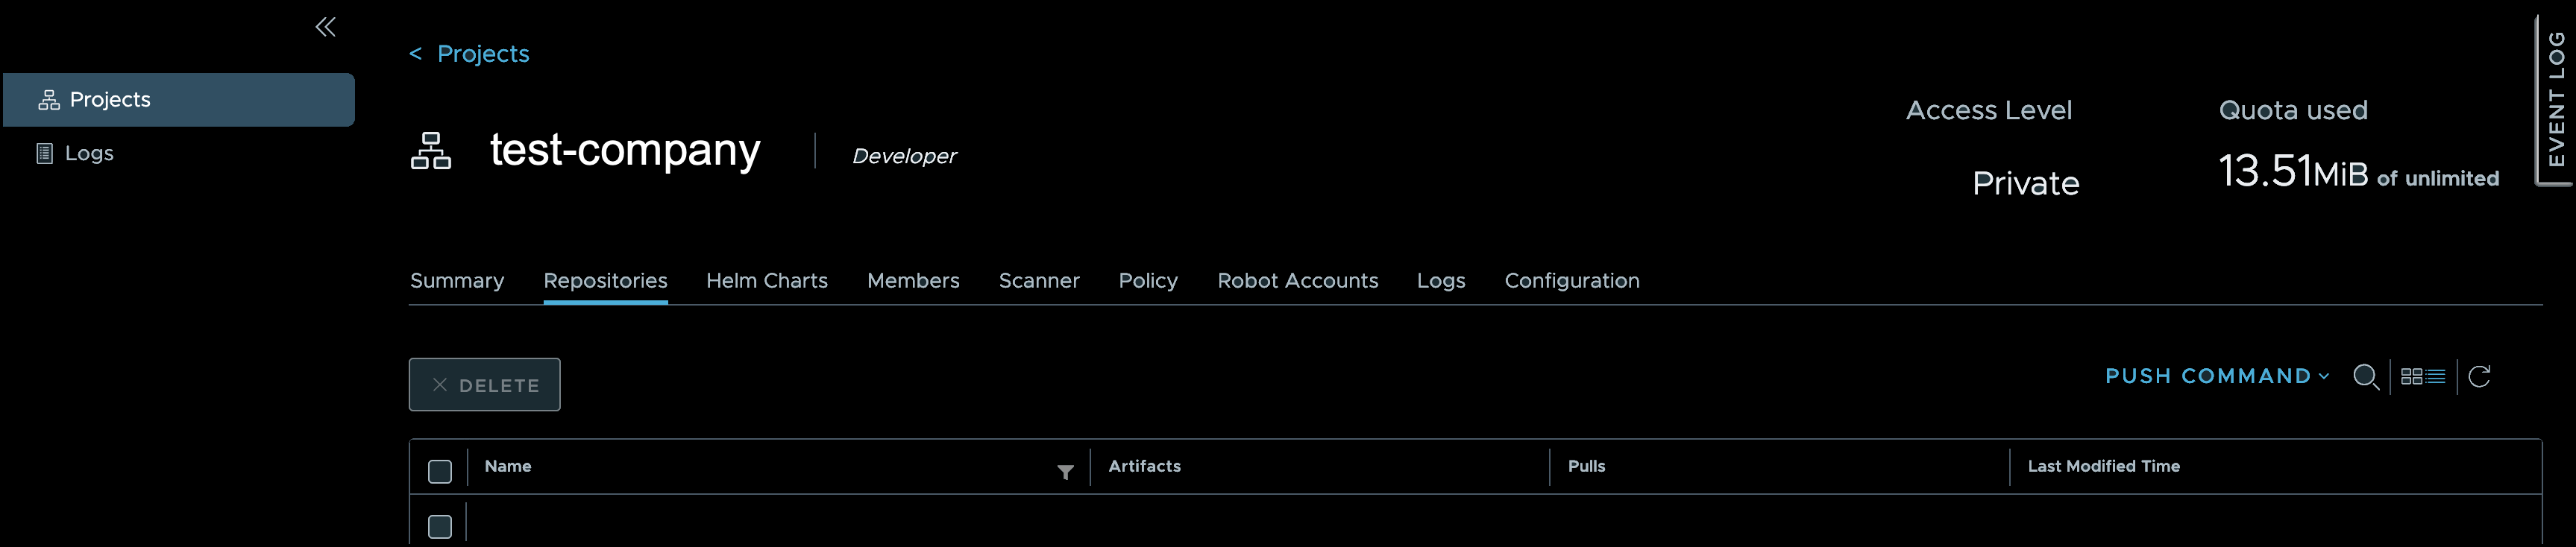
-
Click the Push Command button to open a modal that provides Docker push command syntax. This syntax is meant to guide you when manually tagging and pushing images to Harbor. You can copy the sample lines, such as Tag an image for this project or Push an image to this project directly into your terminal.
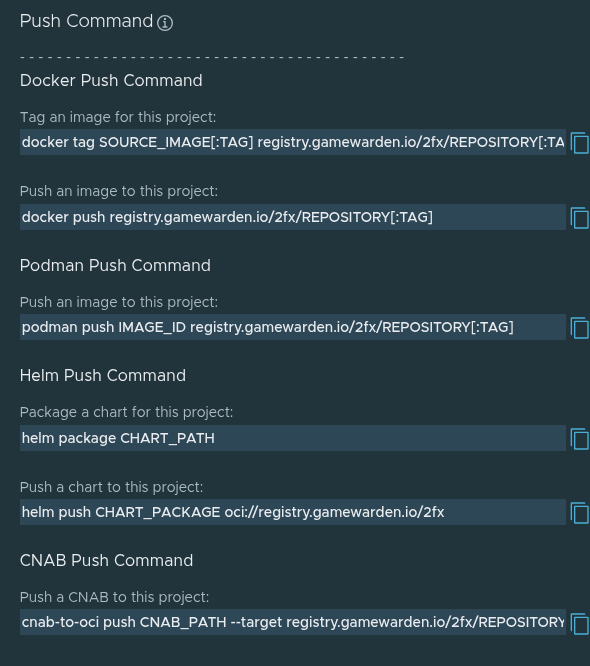
For detailed instructions and example commands, review the Harbor Image Push guide. Be sure to update the syntax to match your image name and tag.
Retrieve Harbor CLI credentials
- Click your account name in the top-right corner.
- From the dropdown, choose User Profile.
-
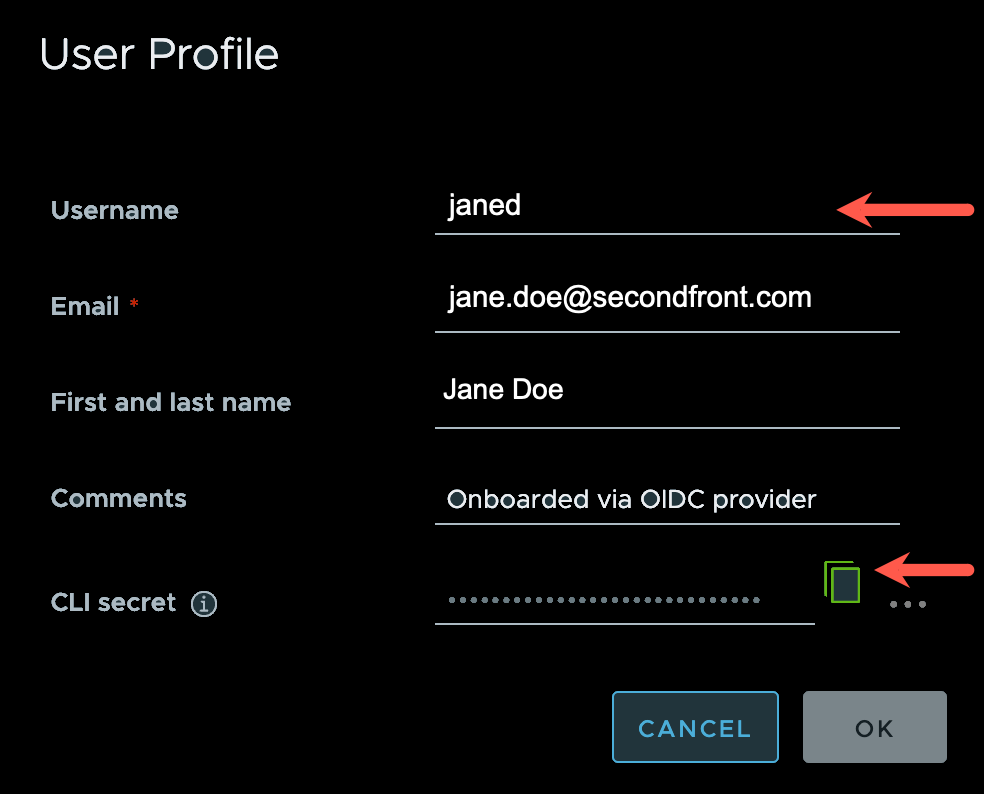
In the User Profile modal:
- Note the Username — you'll need it for Docker login.
- Click the Copy icon next to the CLI secret field. A “Copy success” banner will appear, and your CLI secret will be temporarily stored in your clipboard. Be sure to paste it promptly when logging in with Docker.
-
Click Cancel to close the modal.