Access Control in Game Warden for DoW Deployment
Game Warden leverages Keycloak for identity and access management, integrated with Platform One Single Sign-On (P1 SSO) to authenticate users across its platform. While Game Warden centrally handles authentication, application owners are responsible for implementing authorization—ensuring only the right users can access specific resources within their application.
This guide walks you through how authentication and authorization work across the platform, and what steps your organization must take to ensure secure access control.
Keycloak and P1 SSO
Keycloak is integrated with P1 SSO, allowing users to sign in once using their government-issued credentials (e.g., CAC, ECA, or PIV) and access all Game Warden services. When users complete the onboarding process with P1, their Keycloak account is created automatically.
Default access behavior and application-level control
By default, any user with a valid P1 SSO account and knowledge of your application’s environment URL (DEV, STG, PRD) can access your application unless explicit restrictions are implemented. Game Warden does not automatically restrict user access based on roles or affiliation. Access control must be implemented by the application using the JWT token provided after authentication.
Note
For apps hosted at IL4 or IL5, end-users must have a valid Government Access Card linked to their P1 SSO account.
How JWT authorization works
After authenticating through P1 SSO, Keycloak issues a JSON Web Token (JWT) containing verified user identity claims.
When integrating your applications with Game Warden, two primary actions occur:
- Authentication (AuthN) – Keycloak authenticates the user.
- Authorization (AuthZ) – Keycloak determines access level based on group membership and PKI credentials.
After Authservice validates a request, it injects a Bearer token in the Authorization header of the user’s request. This JWT is signed by Keycloak and includes identity and authorization claims. Any pre-existing Authorization header will be replaced.
Your application is responsible for:
Receiving the JWT from Keycloak.
This JWT is injected by Authservice into the Authorization: Bearer header of each request.
Validating the JWT signature and expiration.
This step is optional if you prefer Authservice to handle JWT validation and token expiration. If so, reach out to your Second Front representative to request this setup.
JWTs are signed by Keycloak and should be verified using a trusted public key.
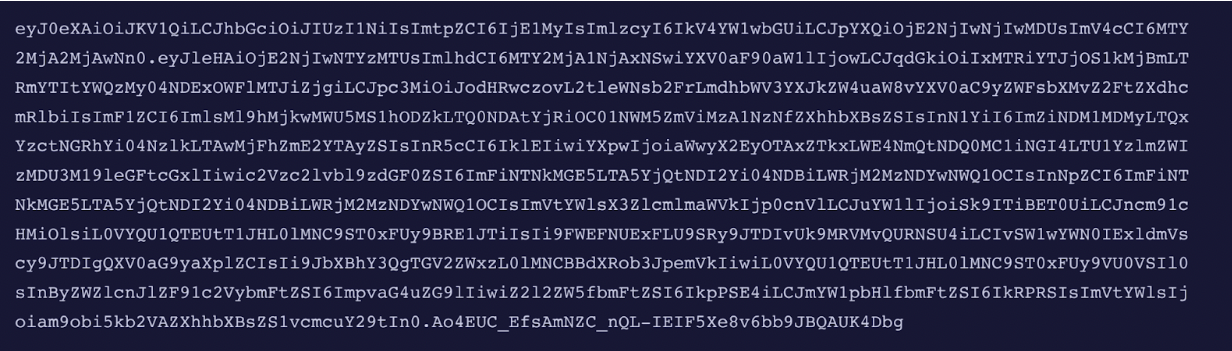
Example encoded JWT
Extracting claims (e.g., user roles, groups)
Example decoded JWT with payload data

Applying authorization logic to control access, ensuring users are only given access to appropriate views or APIs.
Enforcing session expiration and re-authentication policies.
This enables you to build role-based or attribute-based access controls directly into your application.
How to validate JWTs
Note
In a typical OpenID Connect (OIDC) flow, your application would initiate login by redirecting the user to Keycloak. Once authenticated, Keycloak redirects the user back to your app with a token. Your app would then use this token to manage sessions and authorization headers. In Game Warden, this flow is handled automatically behind the scenes. Your app receives requests only after the user is authenticated, eliminating the need for manual OIDC session setup.
When your app receives a request from a logged-in user, Authservice automatically injects the Authorization: Bearer header into that request. This JWT is signed by Game Warden’s Keycloak and contains the user’s identity and role/group claims.
To validate the JWT on your application side:
- Extract the token from the Authorization header (e.g., Authorization: Bearer eyJ...).
- Decode and validate it using a standard JWT library for your language (e.g., PyJWT, jose, etc.).
- Verify the signature using the public key from Keycloak.
If you're using Python, review below resources for details on how to complete the validation:
Tip
Use the sub (subject) field in the JWT to identify users. This is a unique Keycloak subject ID (in GUID format) that remains consistent even if the user's email, name, or affiliation changes. It ensures long-term identity stability across sessions and claims.
Although not specific to Keycloak, the logic is the same. When decoding the JWT, you’ll access the key ID in the token header. Match this key ID to one of the keys from the JWKS endpoint (step 3). The corresponding public key is used to verify the JWT signature using your chosen library.
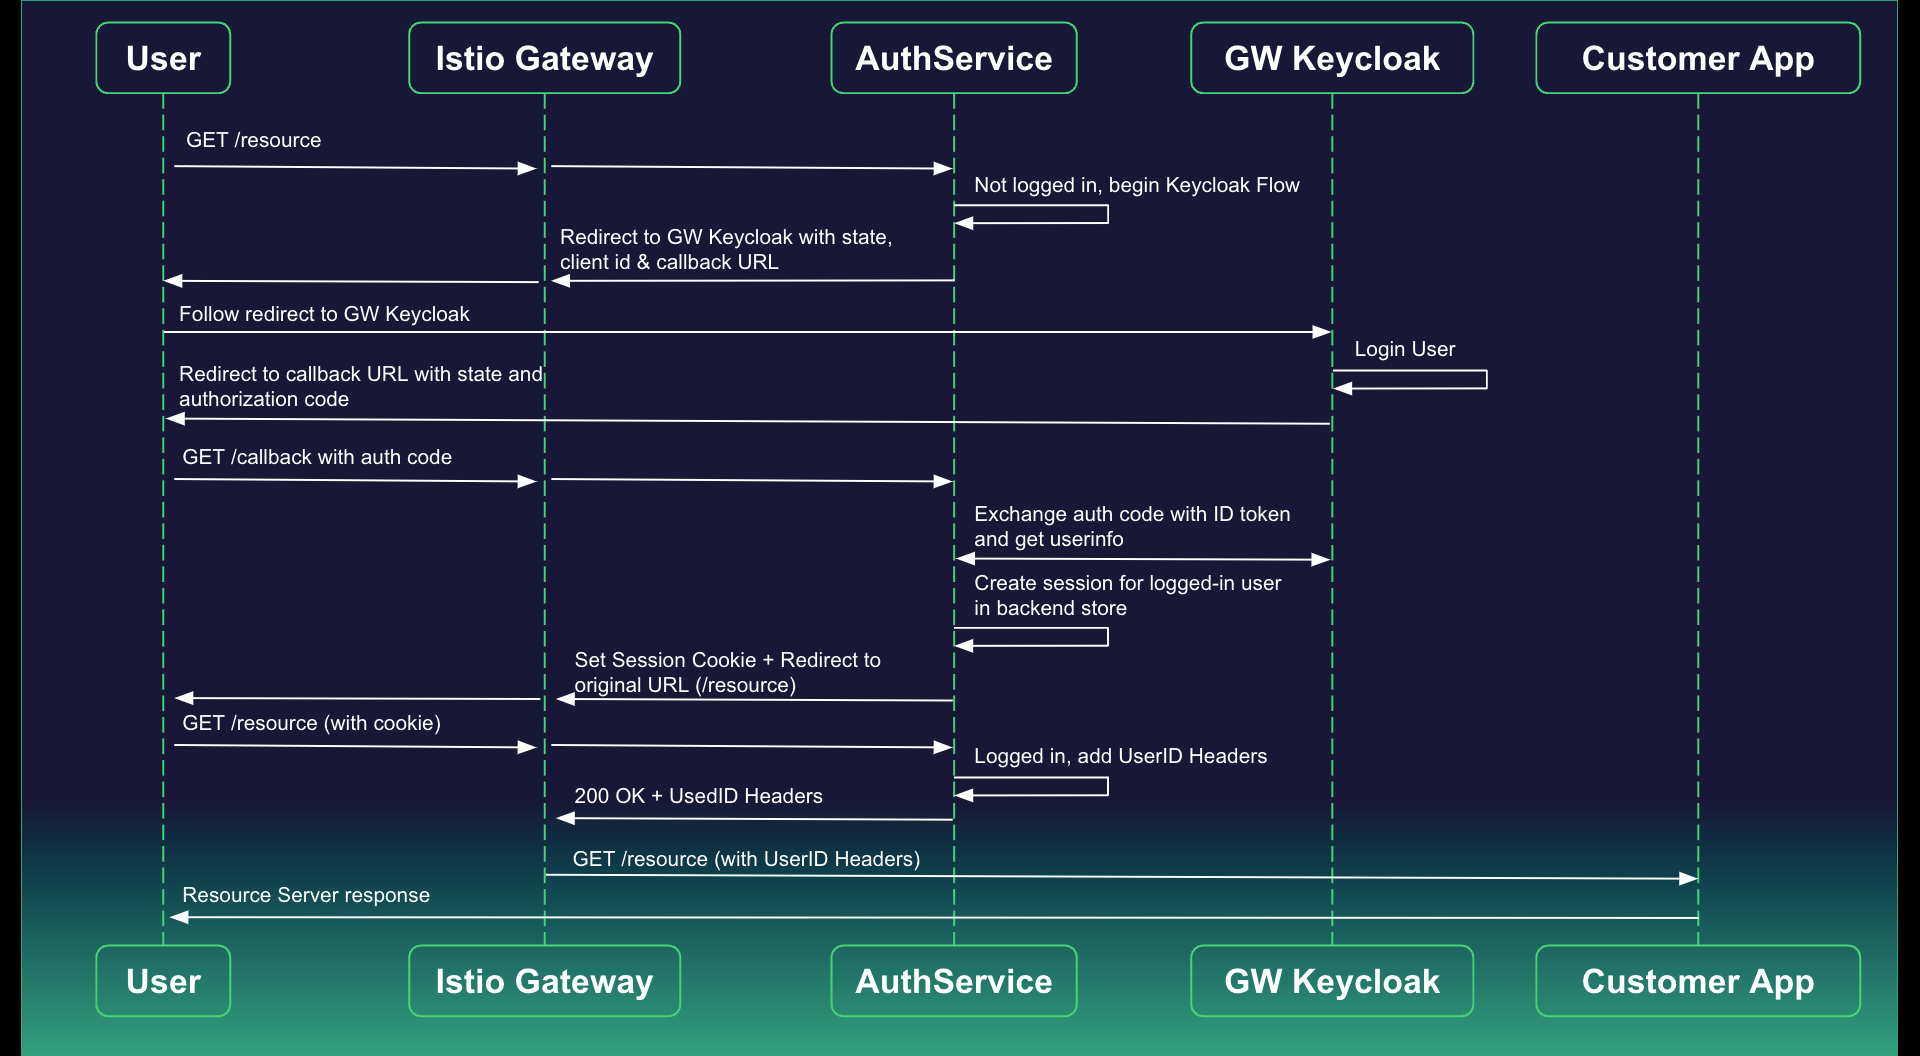
Below is a visual representation of Game Warden's authservice flow:
Best practices for secure access
To protect your application and its users, follow these access control best practices:
- Token storage: Store JWTs in memory whenever possible. Avoid using
localStorageorsessionStorage, as they are more susceptible to cross-site scripting (XSS) attacks. - Token expiration: Monitor JWT expiration and implement automated refresh logic or re-authentication flows.
- Authentication failures: Clearly handle expired or invalid JWTs by redirecting users to the login page or showing an appropriate error.
- Navigation protection: Hide protected routes and features in the UI unless the user has the correct role or claim.
- JWT validation: Always validate the JWT using Keycloak’s public keys to confirm the token’s signature and claims.
- Claim-based authorization: Use fields in the JWT (e.g., roles, groups, email) to implement role-based or attribute-based access control.
- Input sanitization: Ensure any user-submitted data is validated and sanitized to protect against injection attacks.
- Audit logging: Track login attempts, JWT validation failures, and protected resource access for traceability.
Example JWT handling for Game Warden application
Below is a basic example to demonstrate how to extract and validate the JWT in both frontend and backend components of your application.
Frontend example (JavaScript)
// Assume the user is already authenticated and JWT is injected via Authservice
  const token = sessionStorage.getItem("auth_token"); // You may also get this from in-memory or header depending on your flow

  if (token) {
    const payload = JSON.parse(atob(token.split('.')[1]));
    console.log("User ID (sub):", payload.sub);
    console.log("User Roles:", payload.realm_access?.roles);
    // Use this info to conditionally render views or components
  }
Backend example (Python using PyJWT and group-based access control)
import requests
import jwt
from jwt import PyJWKClient

# Step 1: Extract the token from the Authorization header
auth_header = request.headers.get("Authorization")
token = auth_header.split(" ")[1] if auth_header else None

# Step 2: Retrieve public keys from JWKS endpoint
jwks_url = "https://login.afwerx.dso.mil/auth/realms/gamewarden/protocol/openid-connect/certs"
jwks_client = PyJWKClient(jwks_url)
signing_key = jwks_client.get_signing_key_from_jwt(token)

# Step 3: Decode and validate the token
payload = jwt.decode(
    token,
    signing_key.key,
    algorithms=["RS256"],
    audience="your-client-id-here",
    options={"verify_exp": True}
)

print("User ID:", payload['sub'])
print("User Email:", payload.get("email"))
print("User Groups:", payload.get("groups", []))

# Example of group-based authorization
user_is_admin = "/Customers/mycompany/developers" in payload.get("groups", [])
if user_is_admin:
    print("User is an admin.")
print("User roles:", payload.get("realm_access", {}).get("roles", []))
Leverage authorization policies
Game Warden uses Istio in conjunction with Keycloak to apply network-layer authorization policies. This allows you to restrict access to services based on JWT claims such as groups, enabling granular access control that complements your in-application logic.
For example, you could limit access to a specific endpoint to only developers in a DEV environment, or restrict access to a production service to users affiliated with the Air Force. These policies are written in YAML and enforced by Istio before the request reaches your application.
Once your policy is drafted, submit it to your Mission Success Manager (MSM) for applying to your cluster. For questions or assistance, submit a support ticket.
Example policy
# This policy ensures that Identities without this string
# "/Customers/<customer_name>/<some group>" in their JWTs
# group claim are not allowed to reach pods and services
# labeled with "app.kubernetes.io/name": foo

apiVersion: "security.istio.io/v1beta1"
kind: "AuthorizationPolicy"
metadata:
  name: "pgadmin-allow-mmt-developer-group"
  namespace: "mmt"
spec:
  selector:
    matchLabels:
      "app.kubernetes.io/name": foo
  action: DENY
  rules:
  - to:
    - operation:
        hosts: [foo.il2.afwerx.dso.mil"]
    when:
    - key: request.auth.claims[groups]
      notValues: ["/Customers/<customer_name>/<some group>"]

# Auth Pols are granular and flexible in nature instead
# of blocking for a whole host you could just block for a path
# instead by changing the rule object to something like this
- to:
  - operation:
      paths: ["/admin"]
  when:
  - key: request.auth.claims[groups]
    notValues: ["/Customers/<customer_name>/admins"]

# This would have the effect of only allowing users with the admin group
# in the claim from being able to hit the admin endpoints within the application
Enforce account time-out
To maintain a secure posture:
- Enforce idle timeouts and session expiration on both frontend and backend.
- Require users to re-authenticate after a defined period of inactivity.
Users who do not actively access Game Warden resources—such as through authenticating via Keycloak—will be deactivated after 30 days of inactivity.
When this occurs:
- Deactivated users receive an email notification informing them of the deactivation.
- Clicking the Login button in the email directs the user to a reactivation page. If your end user misses the email, they can click this link to start the account re-enablement process.
Info
Reactivation differs slightly depending on the user's credentials:
- DoW PKI users: Logging in with a valid certificate automatically restores their account.
- Non-DoW PKI users: After entering their username, a verification email is sent. Once they verify their email, their account is restored.