Harbor Registry
The Game Warden team uses Harbor as its secure image registry. As an open source and feature-rich registry, Harbor manages the images you push into this environment.
Our Continuous Integration/Continuous Deployment (CI/CD) pipelines move your images through the scanning and hardening processes. The Game Warden team uses Anchore Enterprise and Prisma Cloud to both scan/harden images and identify vulnerabilities. The team also uses ClamAV for malware detection. As your images navigate the scanning and hardening processes, tags are appended to the end of your image names to designate the status of each.
You might use varying methods to push images into Harbor. This article focuses on pushing images manually and, more specifically, from a terminal using Docker commands. Alternatively, if you are using an automated pipeline process, please contact our Customer Operations team. They can provide robot credentials to facilitate this process. Time-defined and commonly distributed for short-term use, robot credentials prevent Harbor session expiration. If you are not using an automated pipeline process, your Harbor session can expire. For example, if you access Harbor in the morning then attempt to push an image into this environment in the afternoon, a Harbor session timeout might occur. This scenario will trigger a failure to authenticate message in your terminal. If your Docker command login credentials (into Harbor) fail to authenticate, simply re-enter these credentials – accessing Harbor from a web browser.
Note
When you use unmodified Iron Bank images in your deployment, the Game Warden team will pull these images directly into our infrastructure (as opposed to you pushing them).
Prerequisites
- Create a Platform One (P1) Single Sign-On (SSO) account.
- Ensure you have authorization to push images into Harbor on behalf of your company. You must provide our Customer Operations team with a list containing the Username and Email Address for each authorized user.
Harbor Access
- Navigate to Harbor.
-
Click Login via OICD Provider and, then click Login with P1 SSO, enter your P1 SSO login credentials.
The Projects page opens, displaying a table.
-
Click to select your project. (Contact our Customer Operations team via Slack if your project is unavailable for selection.)
A new page opens, defaulting to the Repositories tab.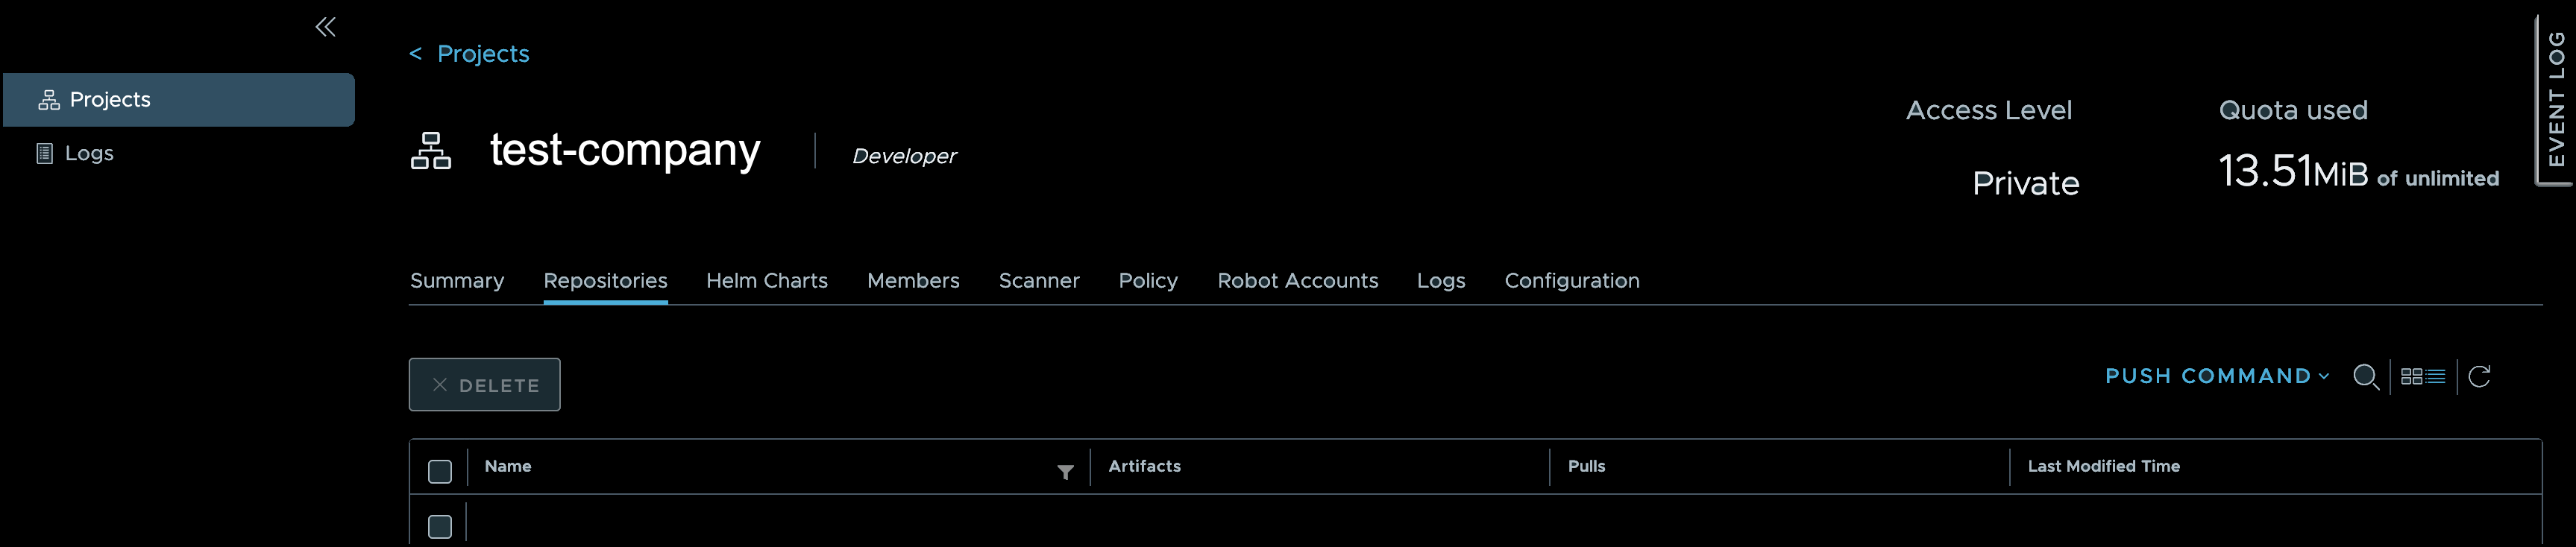
Note
This page (middle right) displays PUSH COMMAND. Select this option to open a modal and view the required terminal syntax for Docker push commands. The information in this modal serves as a mere guide to assist you with syntax. You can use the Tag an image for this project and Push an image to this project syntax, copying each line from this modal for ease of use. In the Image Push section below, you will use these lines and can paste each (separately) into your terminal. You also may use the syntax noted in the sample command statements in this Image Push section. You must update the syntax to align with your image name and tag specifications.
Harbor Credentials
-
Select your P1 account name (top right of Projects page) and, from the drop-down list box, click User Profile.
The User Profile modal opens, displaying several fields to include the last entry – CLI secret. A Copy icon (overlapping squares) appears at the end of this field.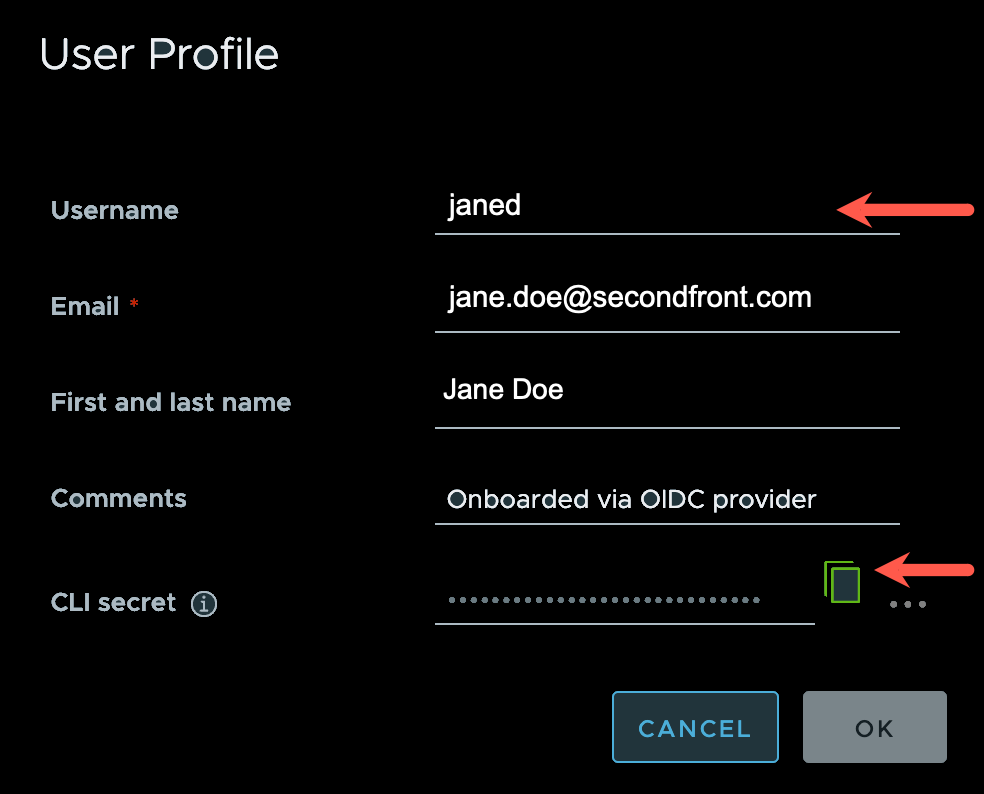
-
Retrieve your CLI secret by clicking the Copy icon.
A banner opens at the top of the User Profile modal and contains the text, copy success. - Record the text in the Username field, as you will need this information in a subsequent step.
The copied CLI secret remains in your clipboard. - Click CANCEL to close the User Profile modal.
Image Push
Image Capacity and Artifact Retention
Image Capacity The Harbor registry is currently only capable of holding five versions of an image. If more than five are pushed, the system will automatically purge the oldest version. We are working to expand the image capacity. Artifact Retention The Game Warden application triggers pipelines continuously and produces artifacts for each pipeline. As such, these artifacts will continue to build and take up storage space. To avoid unnecessary lag, the Game Warden app purges any artifacts over 15 days old.
This means you will have 15 days after pushing images to initiate the pipeline to push to DEV, STG, or PRD. After 15 days, Game Warden will purge the artifacts necessary to push your images. You will need to update your images in Game Warden after that time period. Please note that purged artifacts will not be accessible after the 15 days time period.
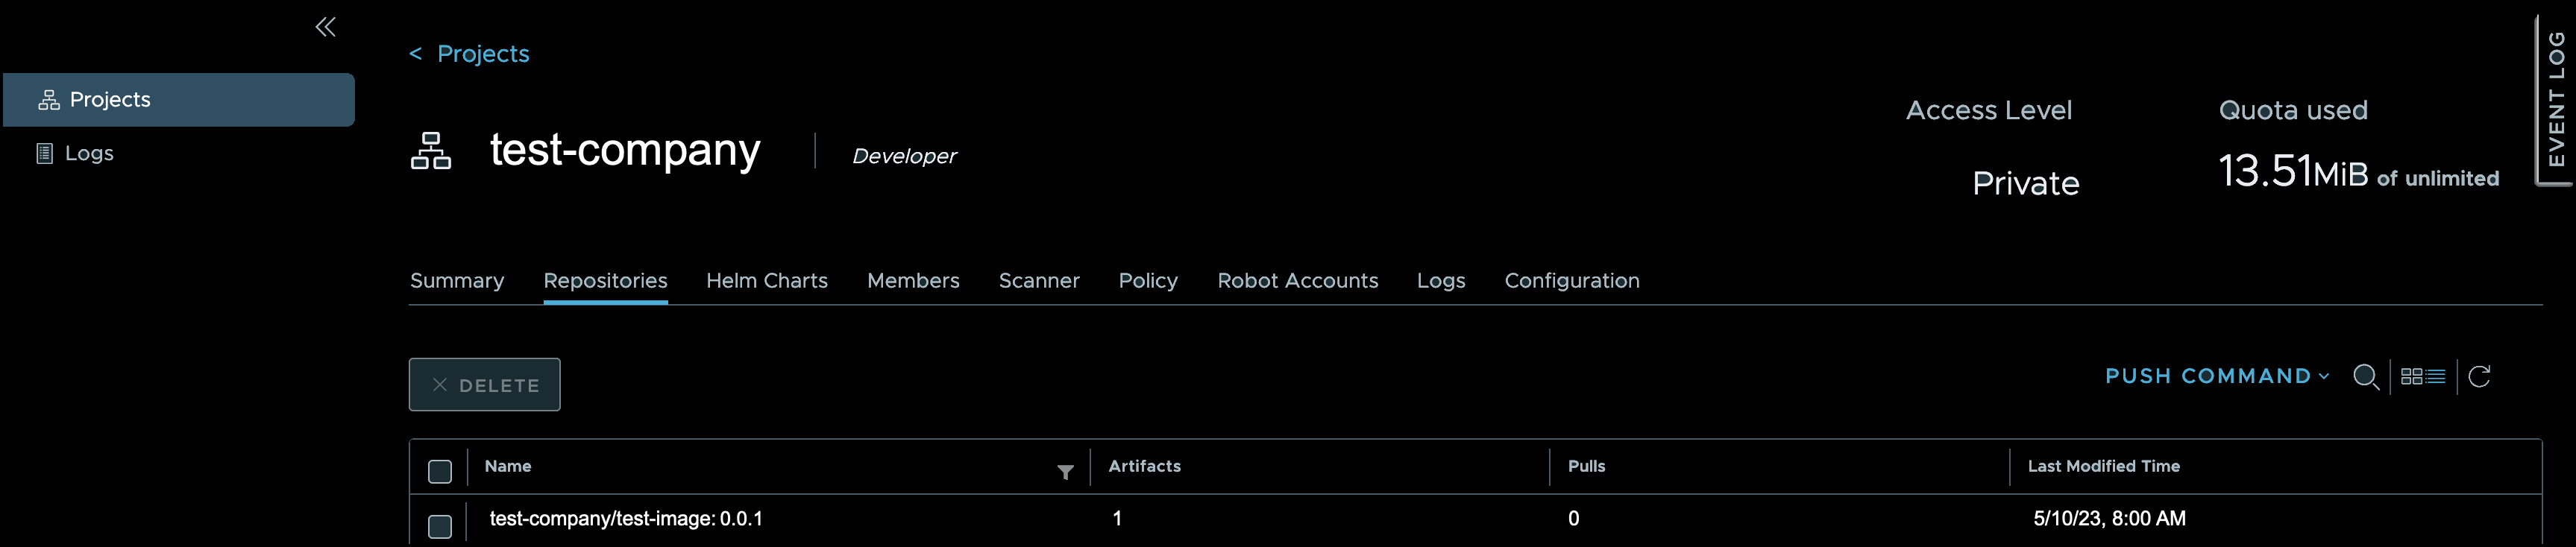
The steps below provide a series of sample commands entered by user, Jane Doe (whose username is janed). Jane is a member of test-company (which is also the name of her project) and will push a new image, test-image. The image tag is 0.0.1.
- Open a terminal session, accessing the command line.
You will type the Username and paste the CLI secret. -
Type:
docker login -u `username` -p `cli-secret` registry.gamewarden.io/Example:
docker login -u janed -p password123 registry.gamewarden.io/ -
Click Enter.
Several lines display, including Login Succeeded (if accurate credentials entered). You have successfully accessed Harbor from your local machine. If your login credentials fail, ensure you have an authenticated/active Harbor session running from your web browser. Next, you must re-tag your image.Do not use the following for your image tag: - "-hardened" - "latest" - ".sig" - "sha256" - "development" - "staging" - "production" Your app's Deployment Passport requires a specific image version number and Harbor will not recognize the above tags so your pushed images will not be run through the pipelines. Instead, tag your images with the latest version number (for example, 0.2.1) in accordance with Semantic Versioning principles.
-
Type:
docker tag SOURCE_IMAGE[:TAG] registry.gamewarden.io/test-company/REPOSITORY[:TAG]Example:
docker tag your-registry/your-project/previous-image-name:previous-tag registry.gamewarden.io/test-company/test-image:0.0.1This command identifies the source/previous image name and tag information then references the image name and associated tag specific to the image you are pushing.
-
Type (optionally):
docker image ls
This command enables you to view a list of your existing images (void of other files). Example Output:
-
Type:
docker push registry.gamewarden.io/your-project/image:tagExample:
docker push registry.gamewarden.io/test-company/test-image:0.0.1
Several lines display. You have pushed your image into the Harbor registry. -
Return to Harbor to confirm that you have successfully pushed your image into this environment.
- Click to select your project from the Projects page.
A new page opens, defaulting to the Repositories tab. - Identify your new image in the available table, which verifies that you have successfully pushed your image into Harbor.
If your new image is not present, please review your previous steps carefully and determine if any Error or Warning messages were triggered in your terminal session. Also, ensure you are authorized to push images into Harbor on behalf of your company. Contact our Customer Operations team via Slack for further guidance.
After you successfully push an image into Harbor, a webhook updates Docker files then triggers a pipeline that builds and hardens the image. You will be able to view the hardened image in Harbor.
Note
If you continually push the same image into Harbor (with the a new tag), pipelines are triggered for each. Each tag will be available in Harbor. The image line item identifies the most recent date/time you pushed this image tag.